

Suppliers
Tutorial covering the set-up and management of supplier connections in your SSG instance
Detailed documentation for sections covered in this tutorial can be found at:
Add a new supplier and connection
To add a new supplier and SMSC connection to that supplier, use "Quick Create Supplier+SMSC" to create the supplier, SMSC connection and SMSC group.
To start, go to the Suppliers section of the SSG Admin Portal and click "Quick Create Supplier+SMSC".
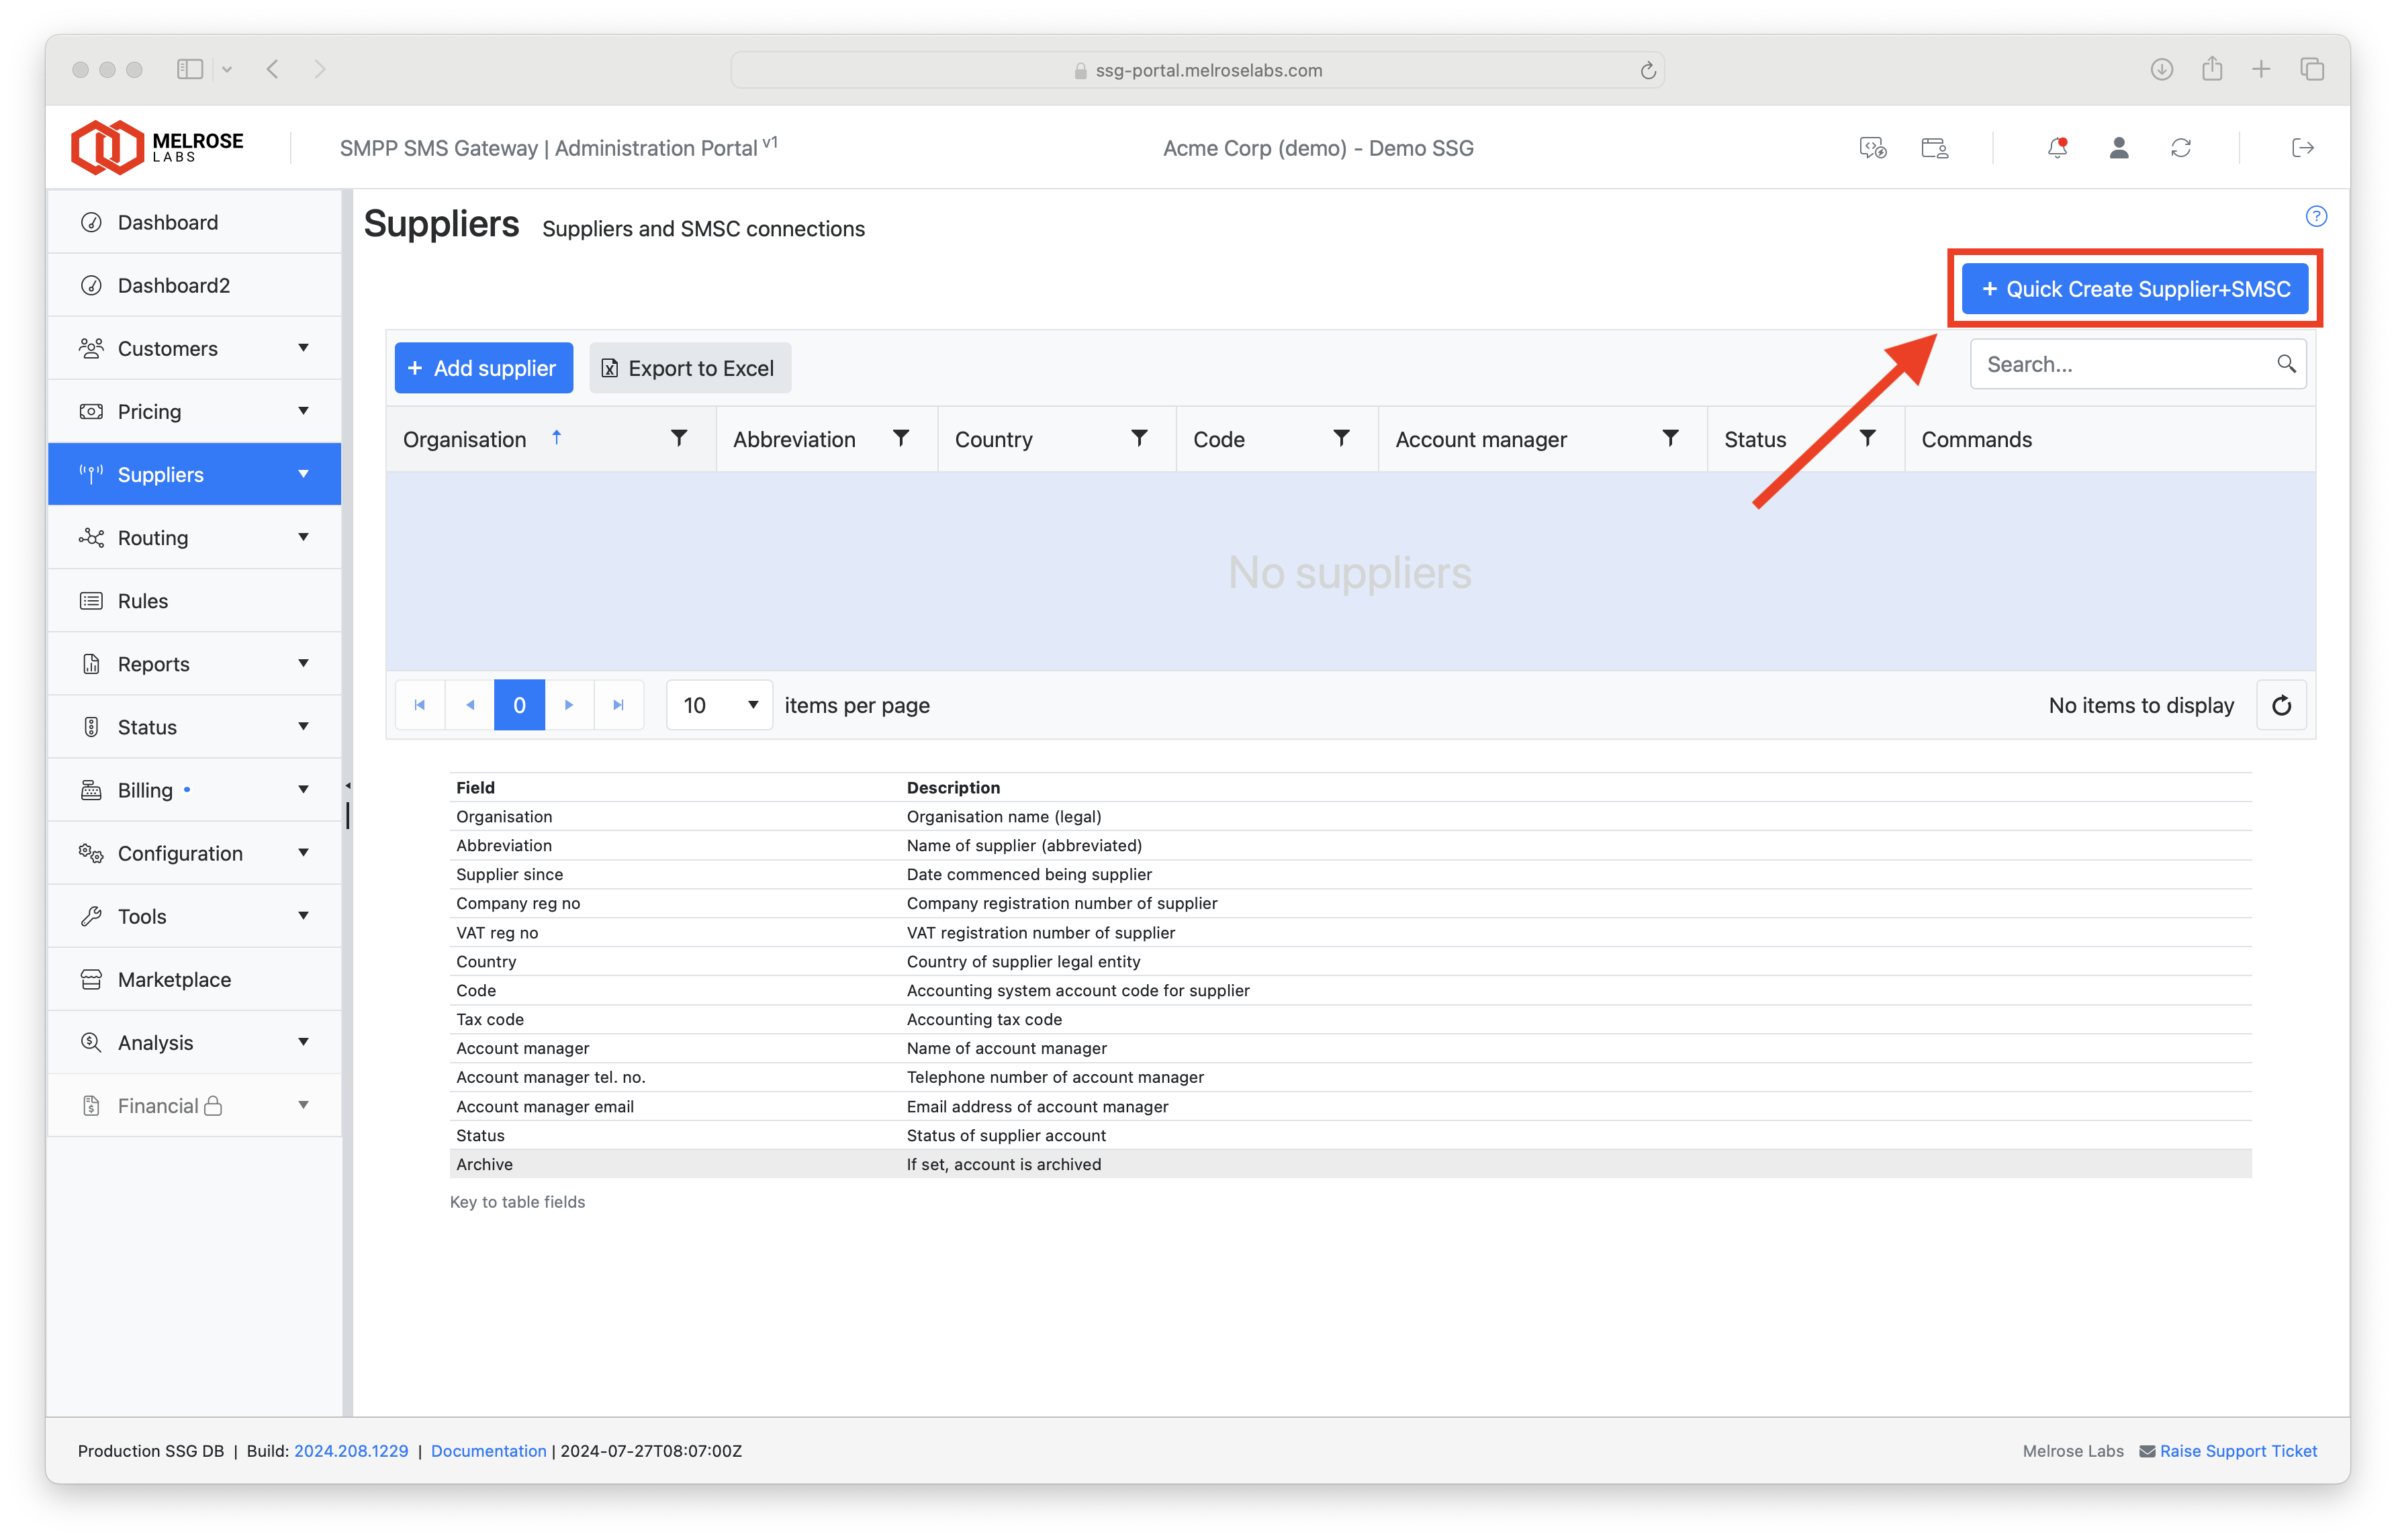
Quick Create Supplier+SMSC
A wizard will open as shown below:
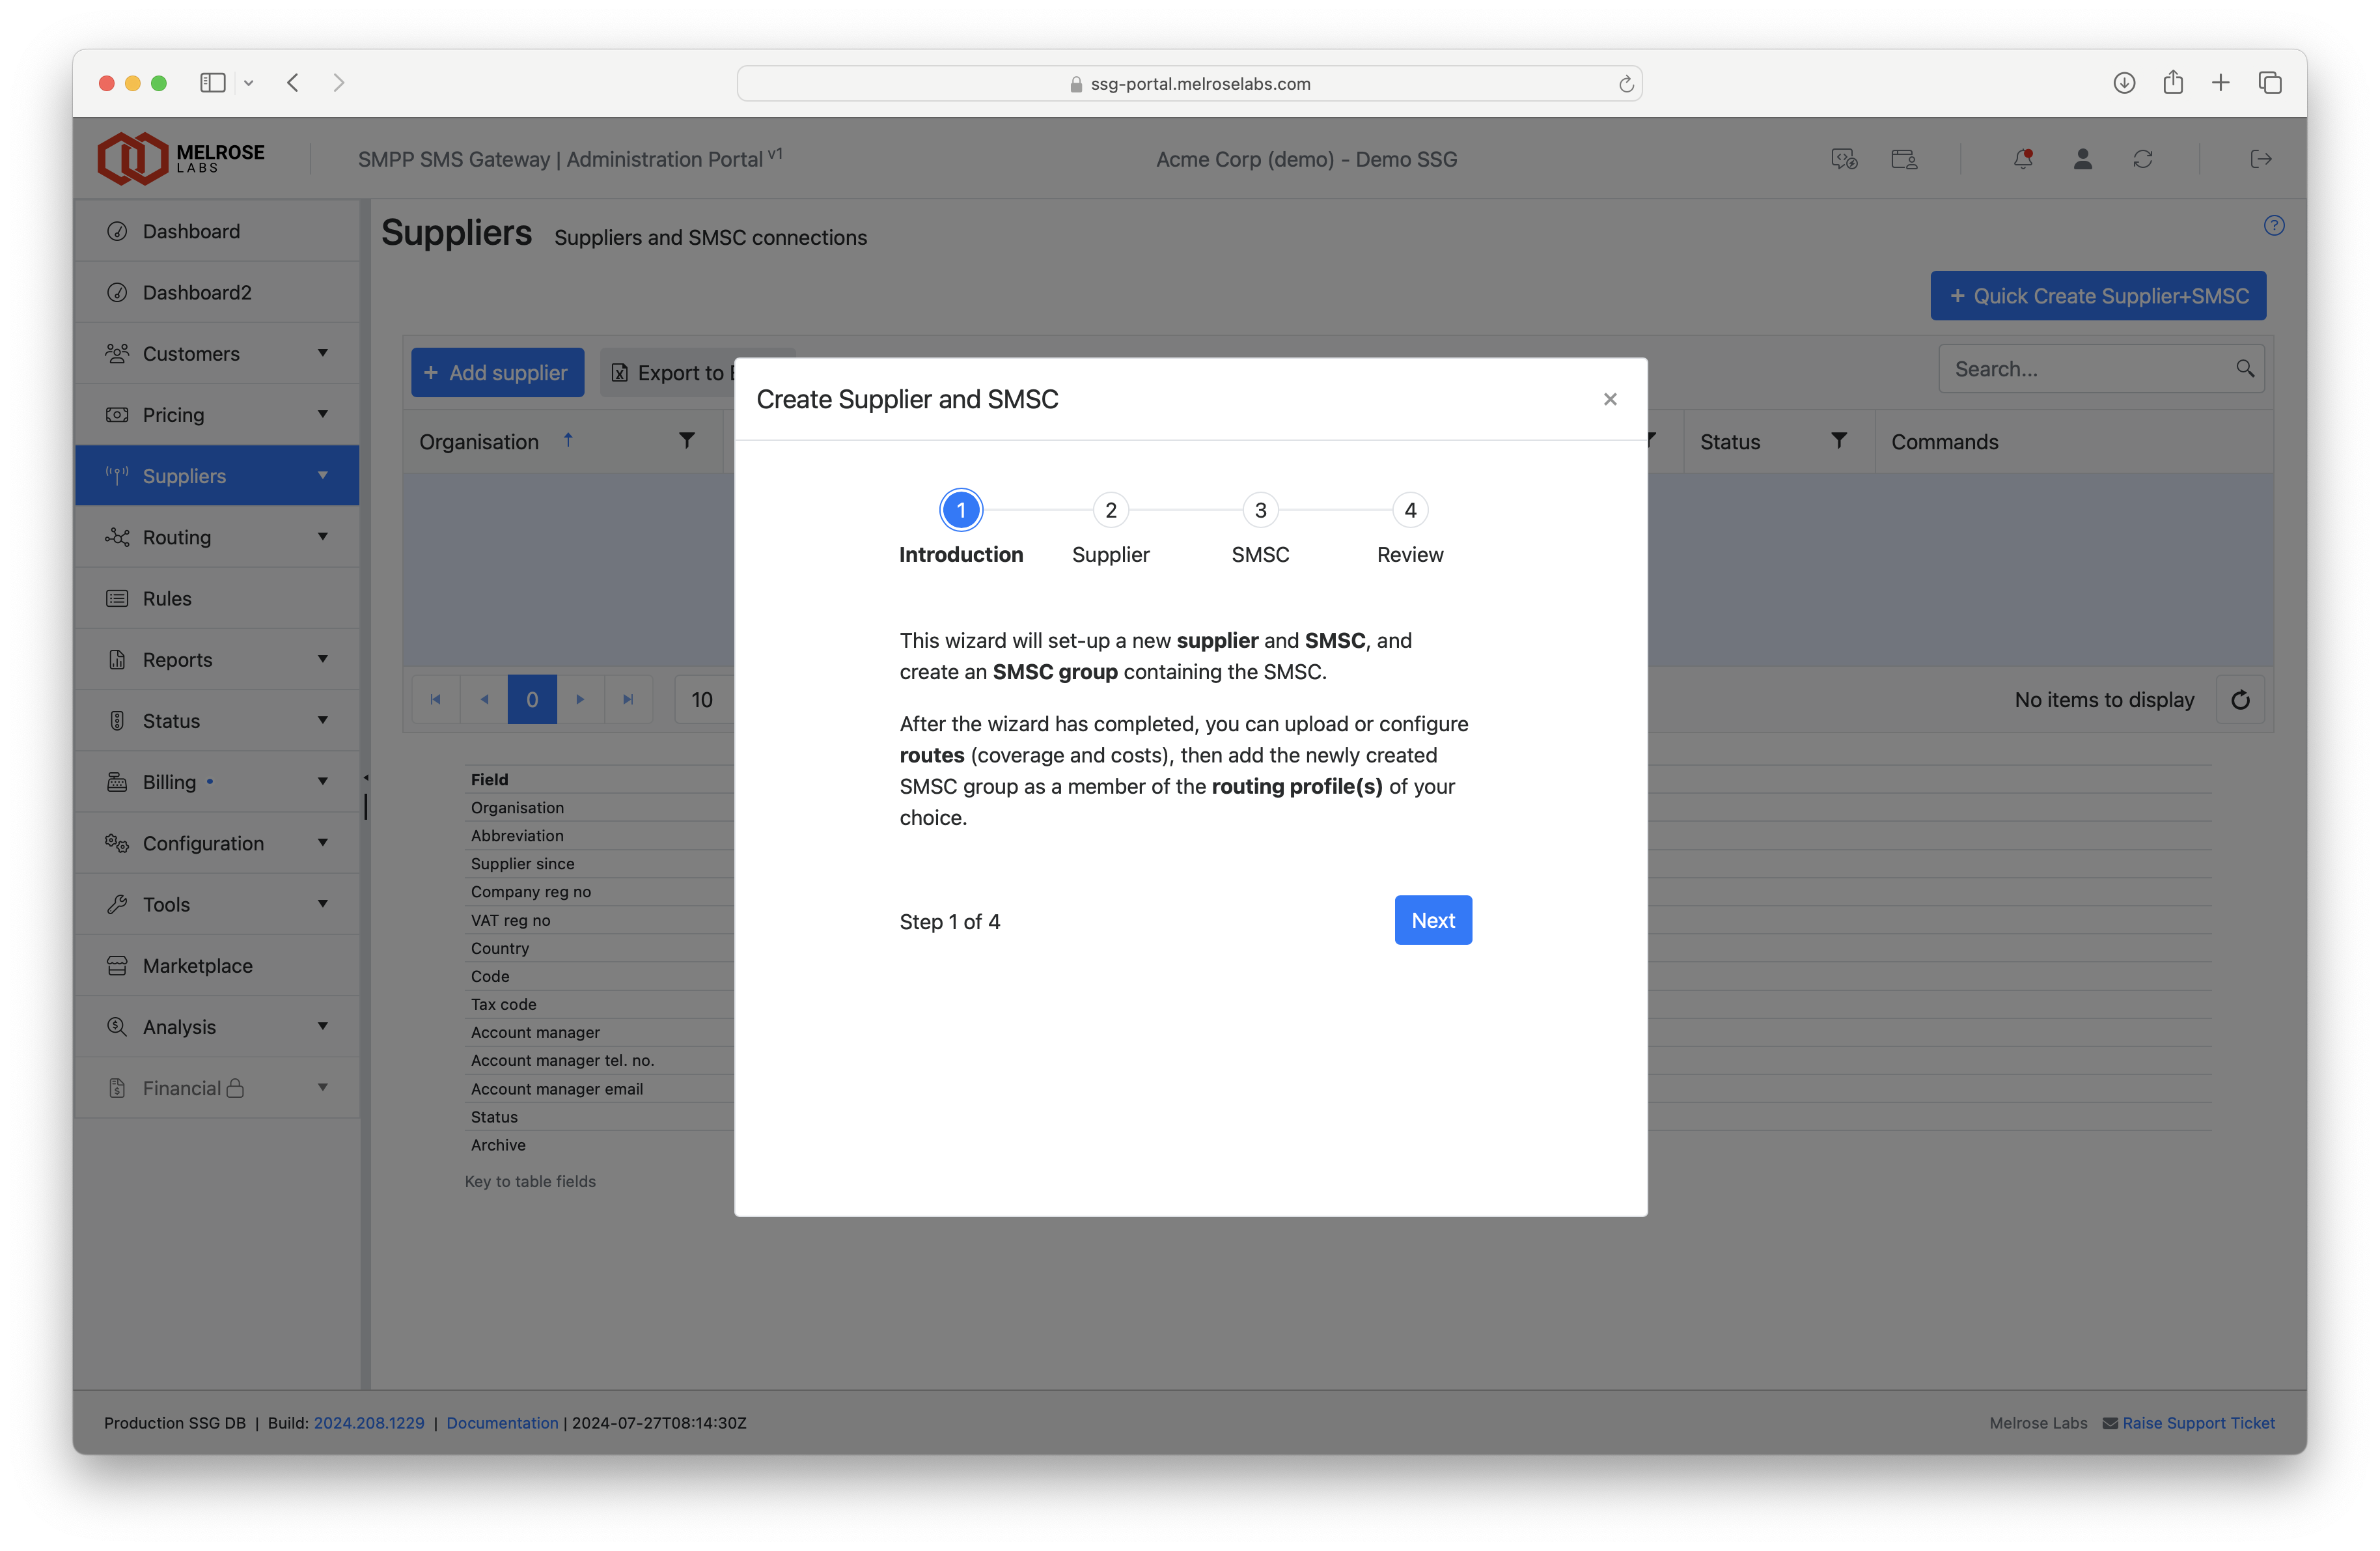
Wizard to create supplier, SMSC and SMSC group
Click Next to go to the Supplier page of the wizard.
Enter the name of your supplier in the "Organisation name" box and select the country of that organisation.
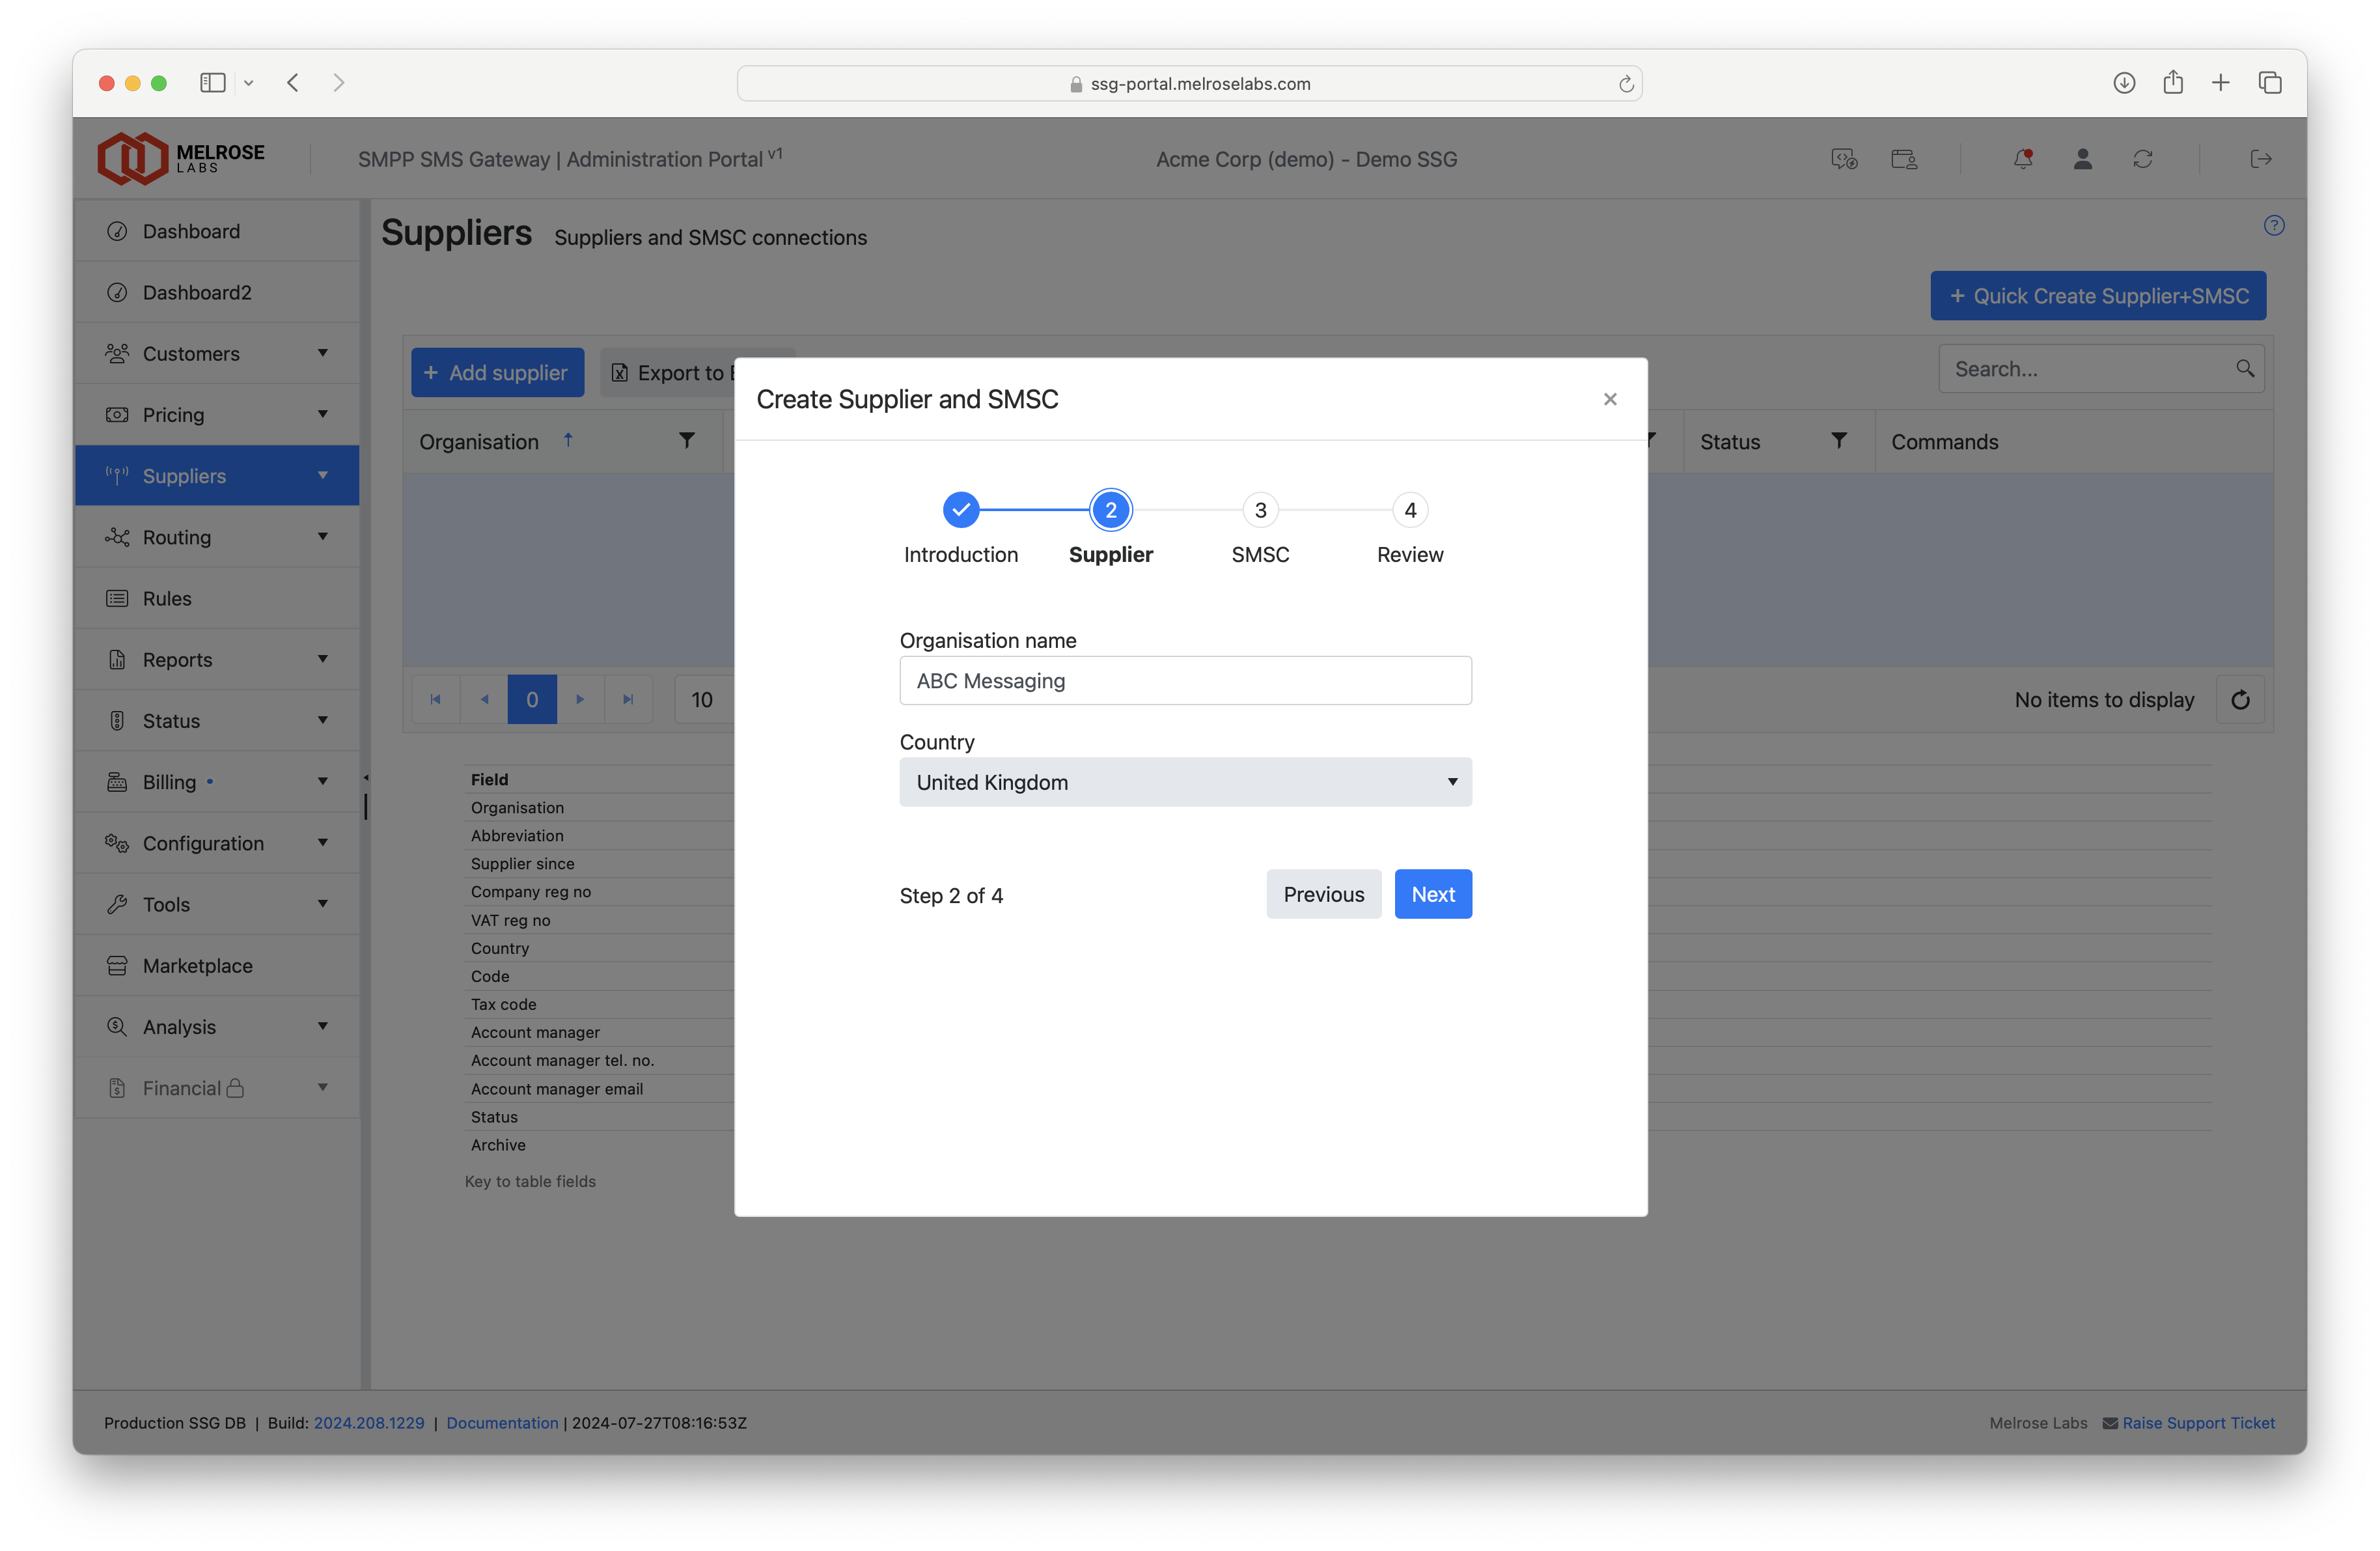
Supplier page of wizard
Click Next to go to the SMSC page of the wizard.
Enter the host, port, system ID and password for the SMPP account from the supplier
Select the SSG location where the connection should be made from to the supplier. The SSG has six global locations from where connections to your suppliers can be made. The IP addresses for these locations can be found in Supplier endpoints.
Note that customer connections and supplier connections do not need to be on the same site for SMS traffic to flow between those customers and suppliers.

SMSC page of wizard
Click Next to go to the Review page of the wizard.
The next page shows the details you have entered for the new supplier and SMSC connection.
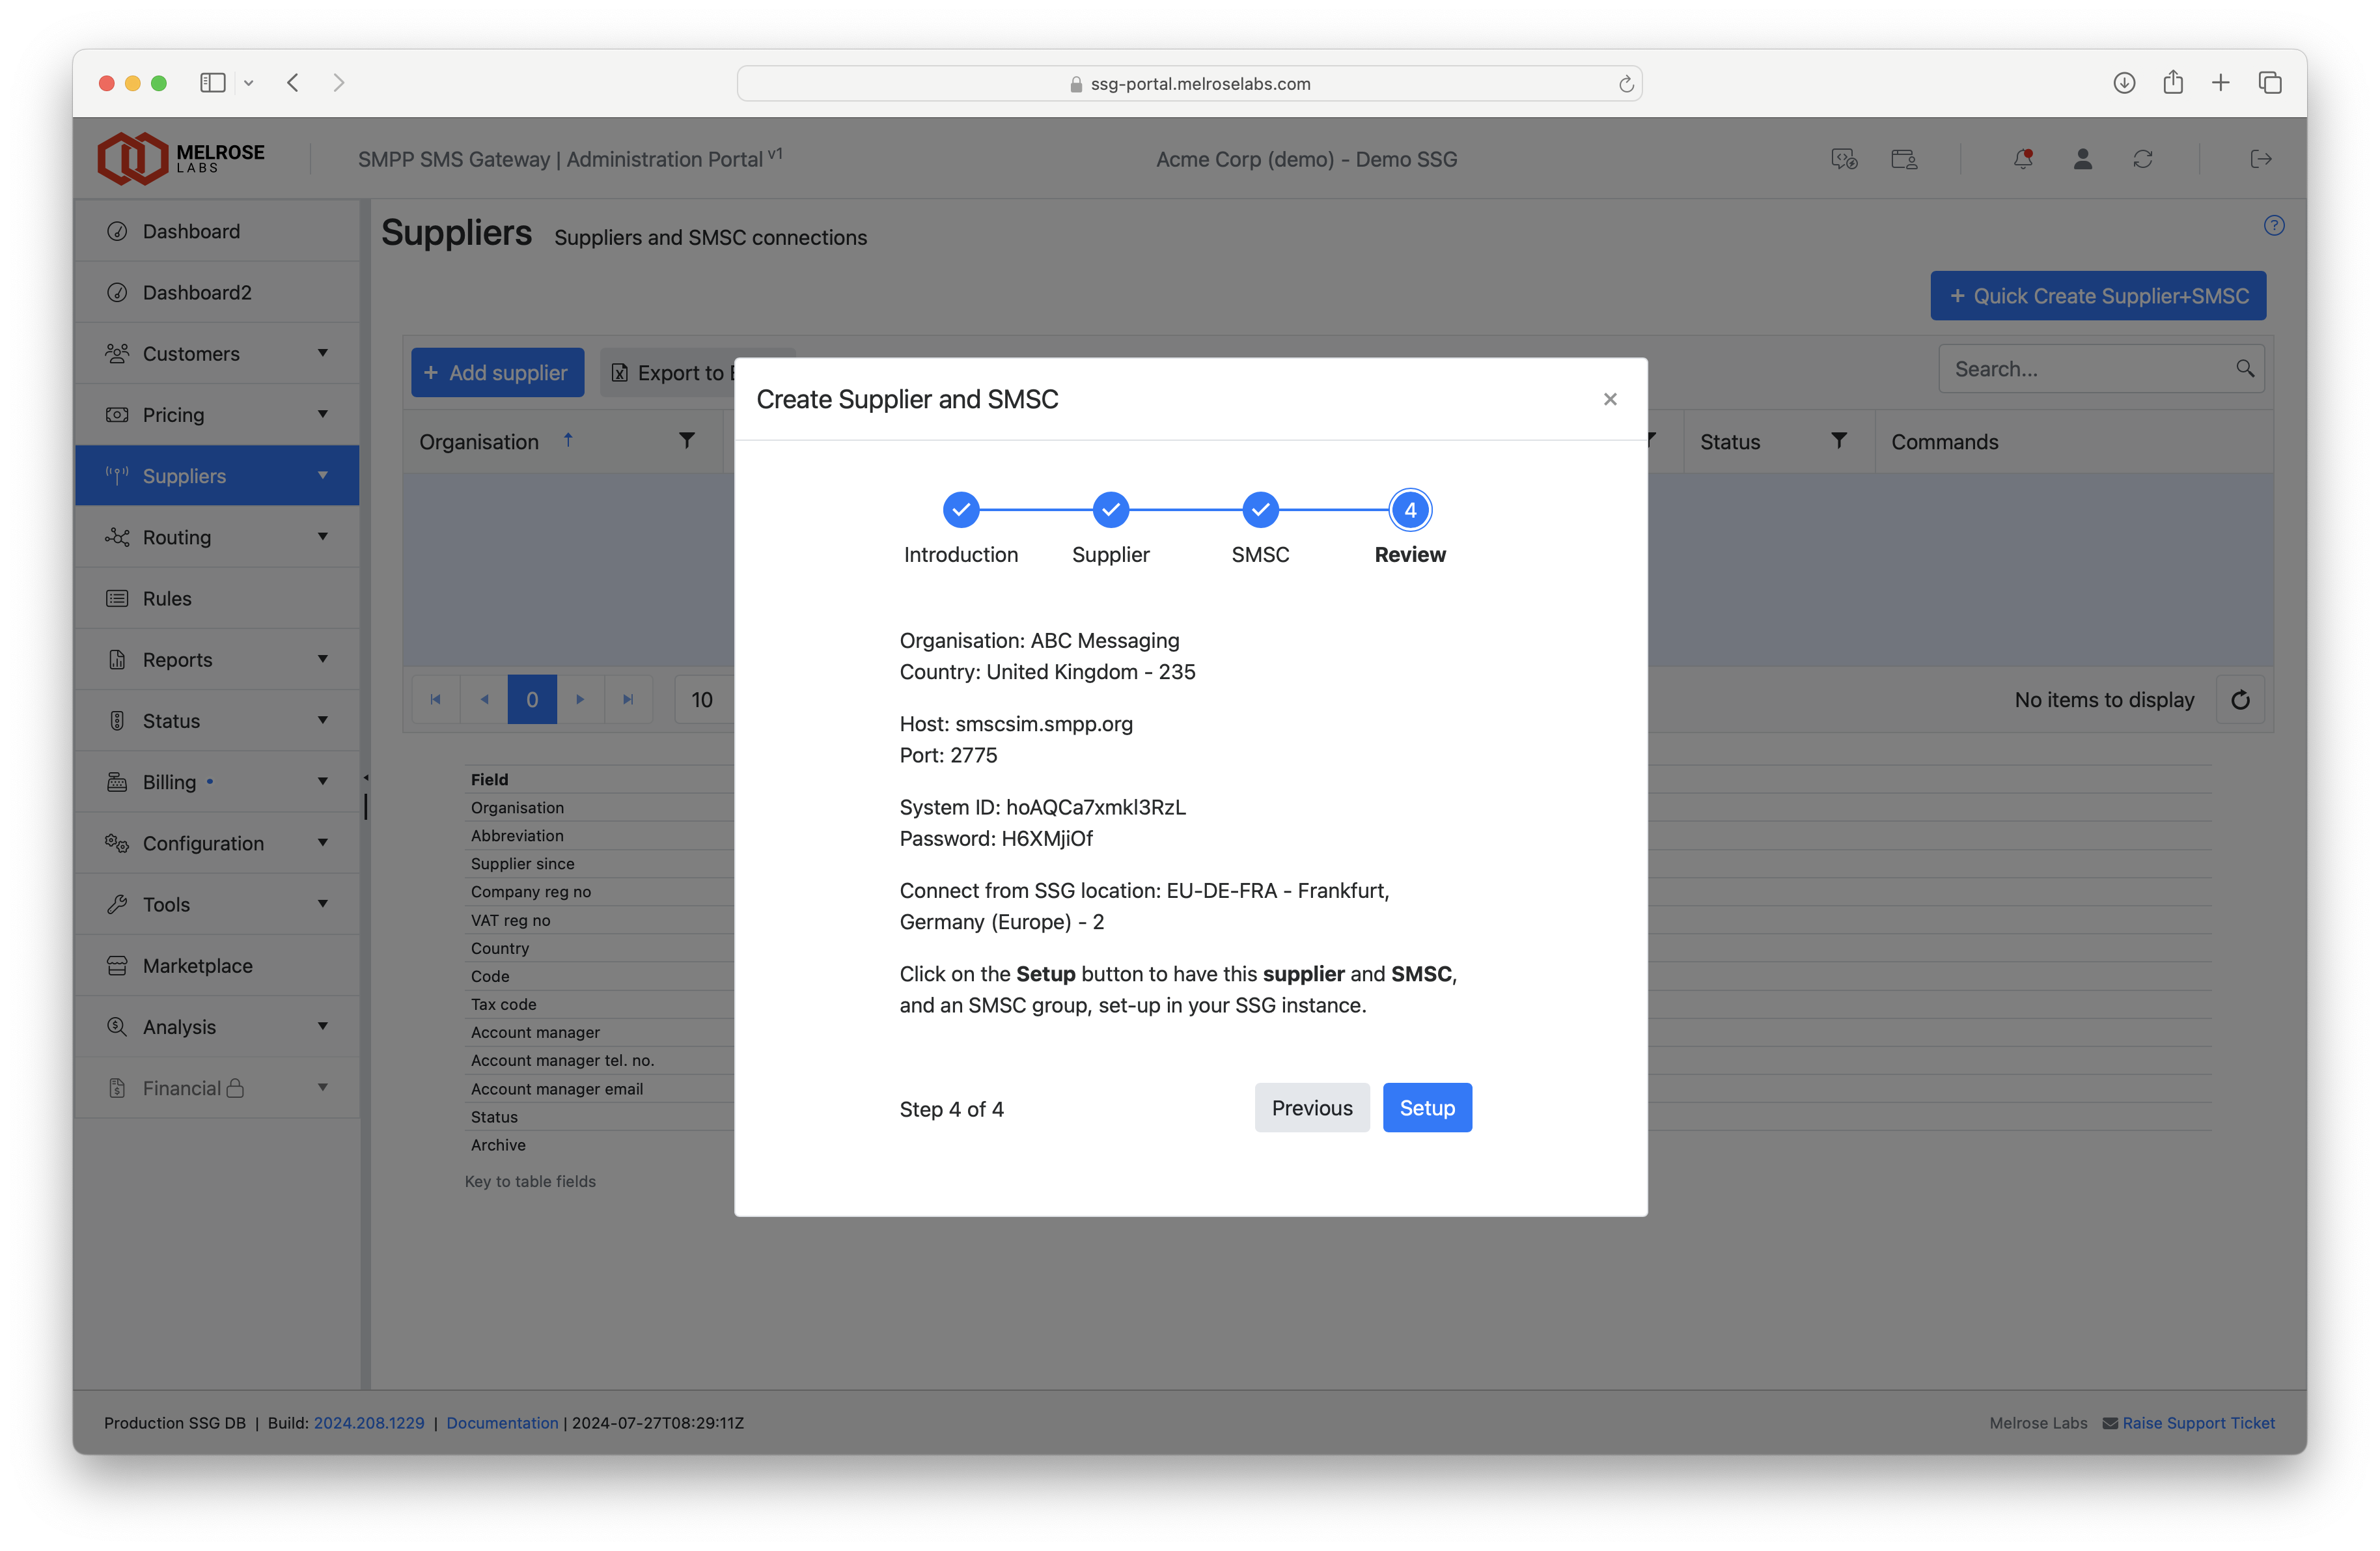
Review page of wizard
If any of the details are incorrect, click the Previous button to go back to the relevant page and correct.
To proceed with setting-up the new supplier and SMSC connection, click Setup.
A dialog will display showing the supplier, SMSC and SMSC group that have been set-up.
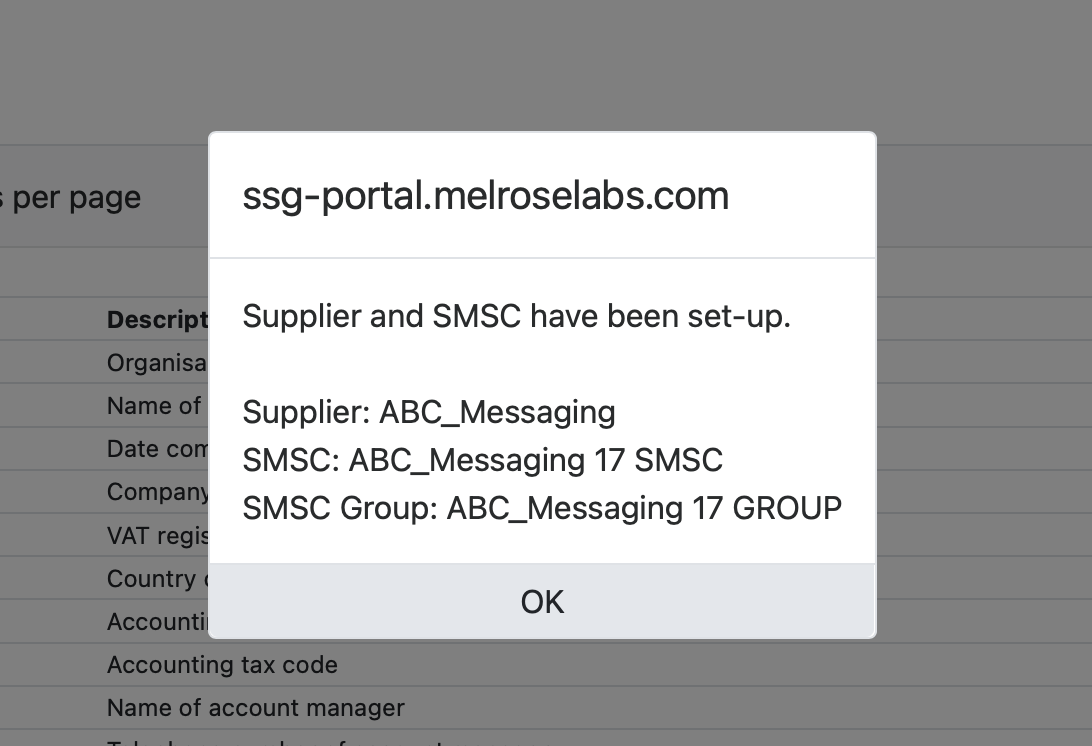
Successfully added supplier, SMSC and SMSC group
Click OK to dismiss this dialog.
The Suppliers section of the SSG Admin Portal now shows the new supplier.
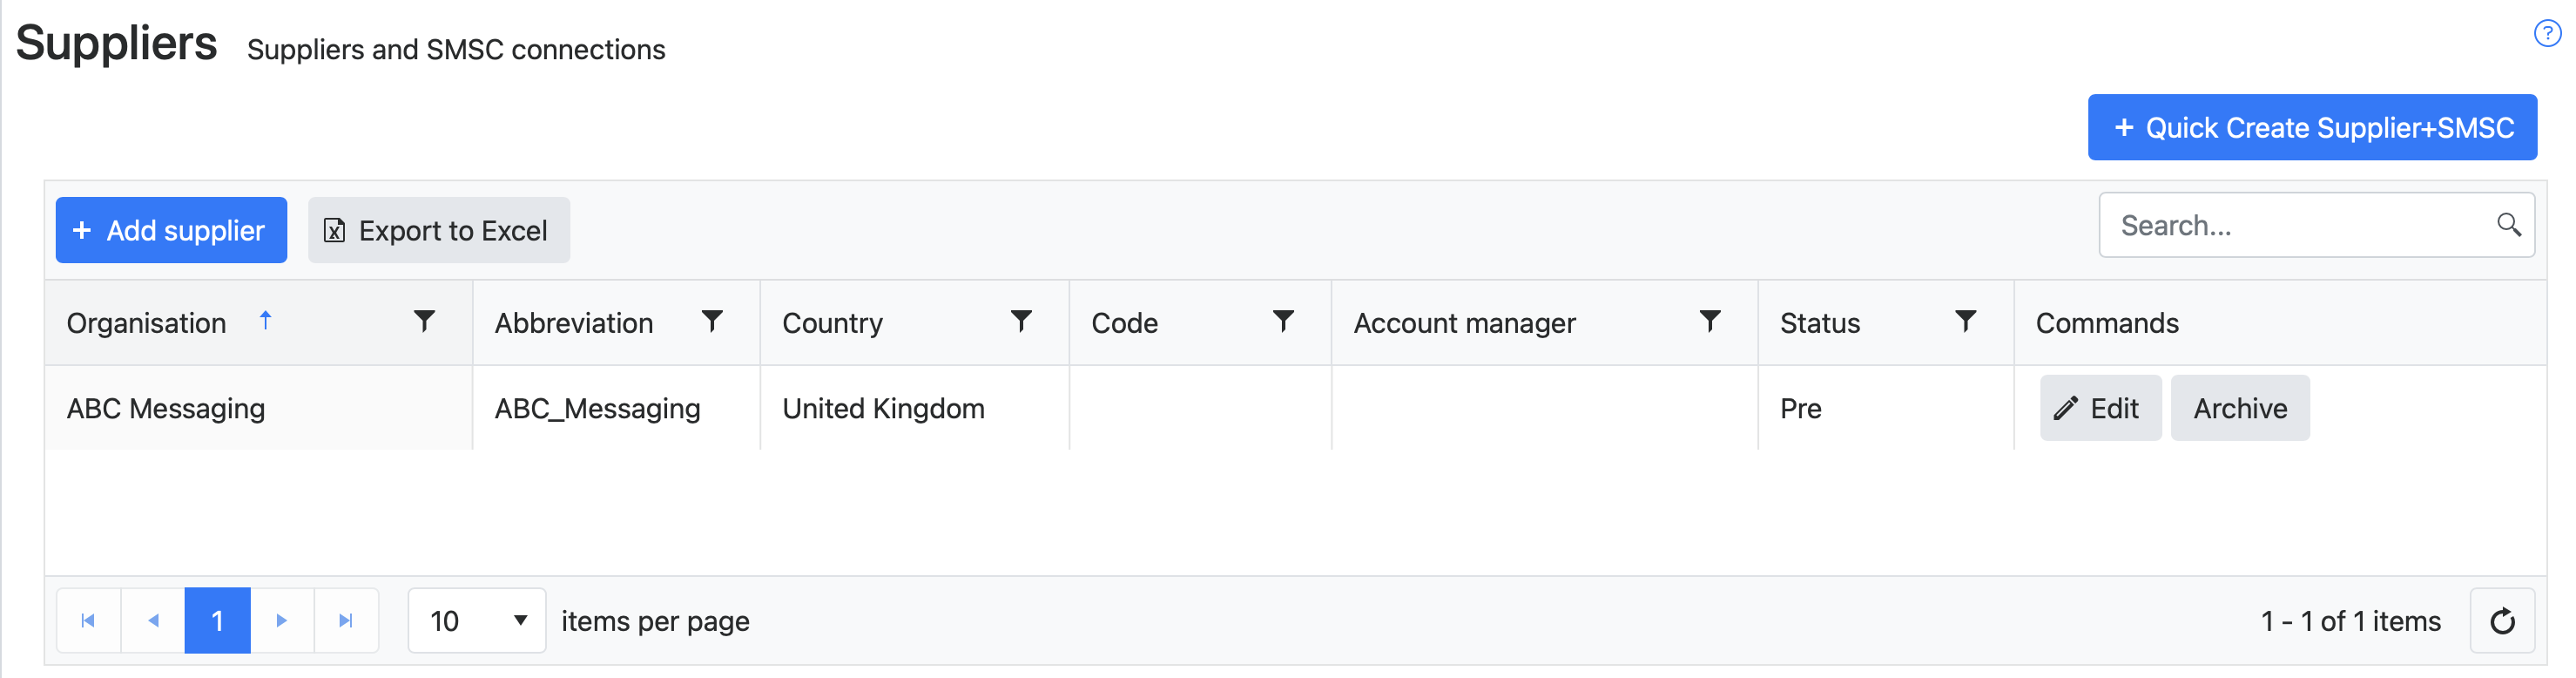
New supplier in suppliers table
Double-click on the new entry in the table or click Edit to open the dialog showing the supplier's details.
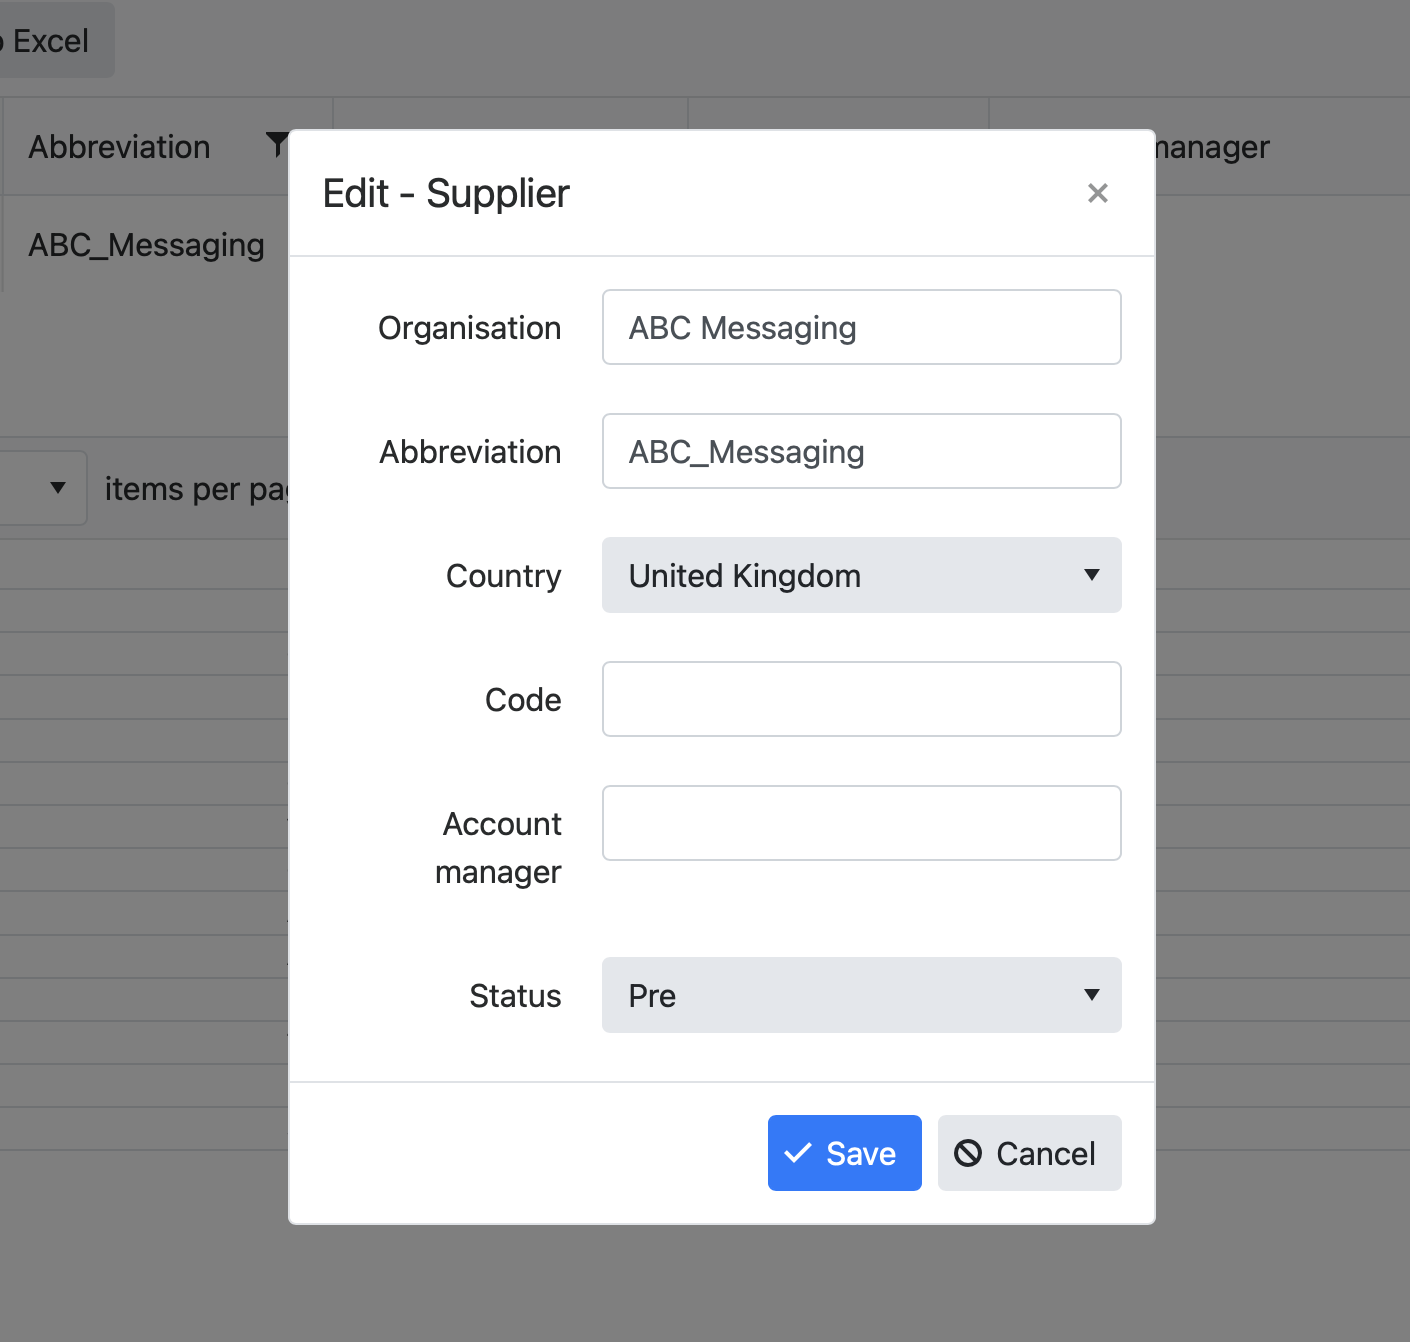
Supplier details dialog
Make any necessary changes to this supplier and then click Save. Click Cancel if not making any changes.
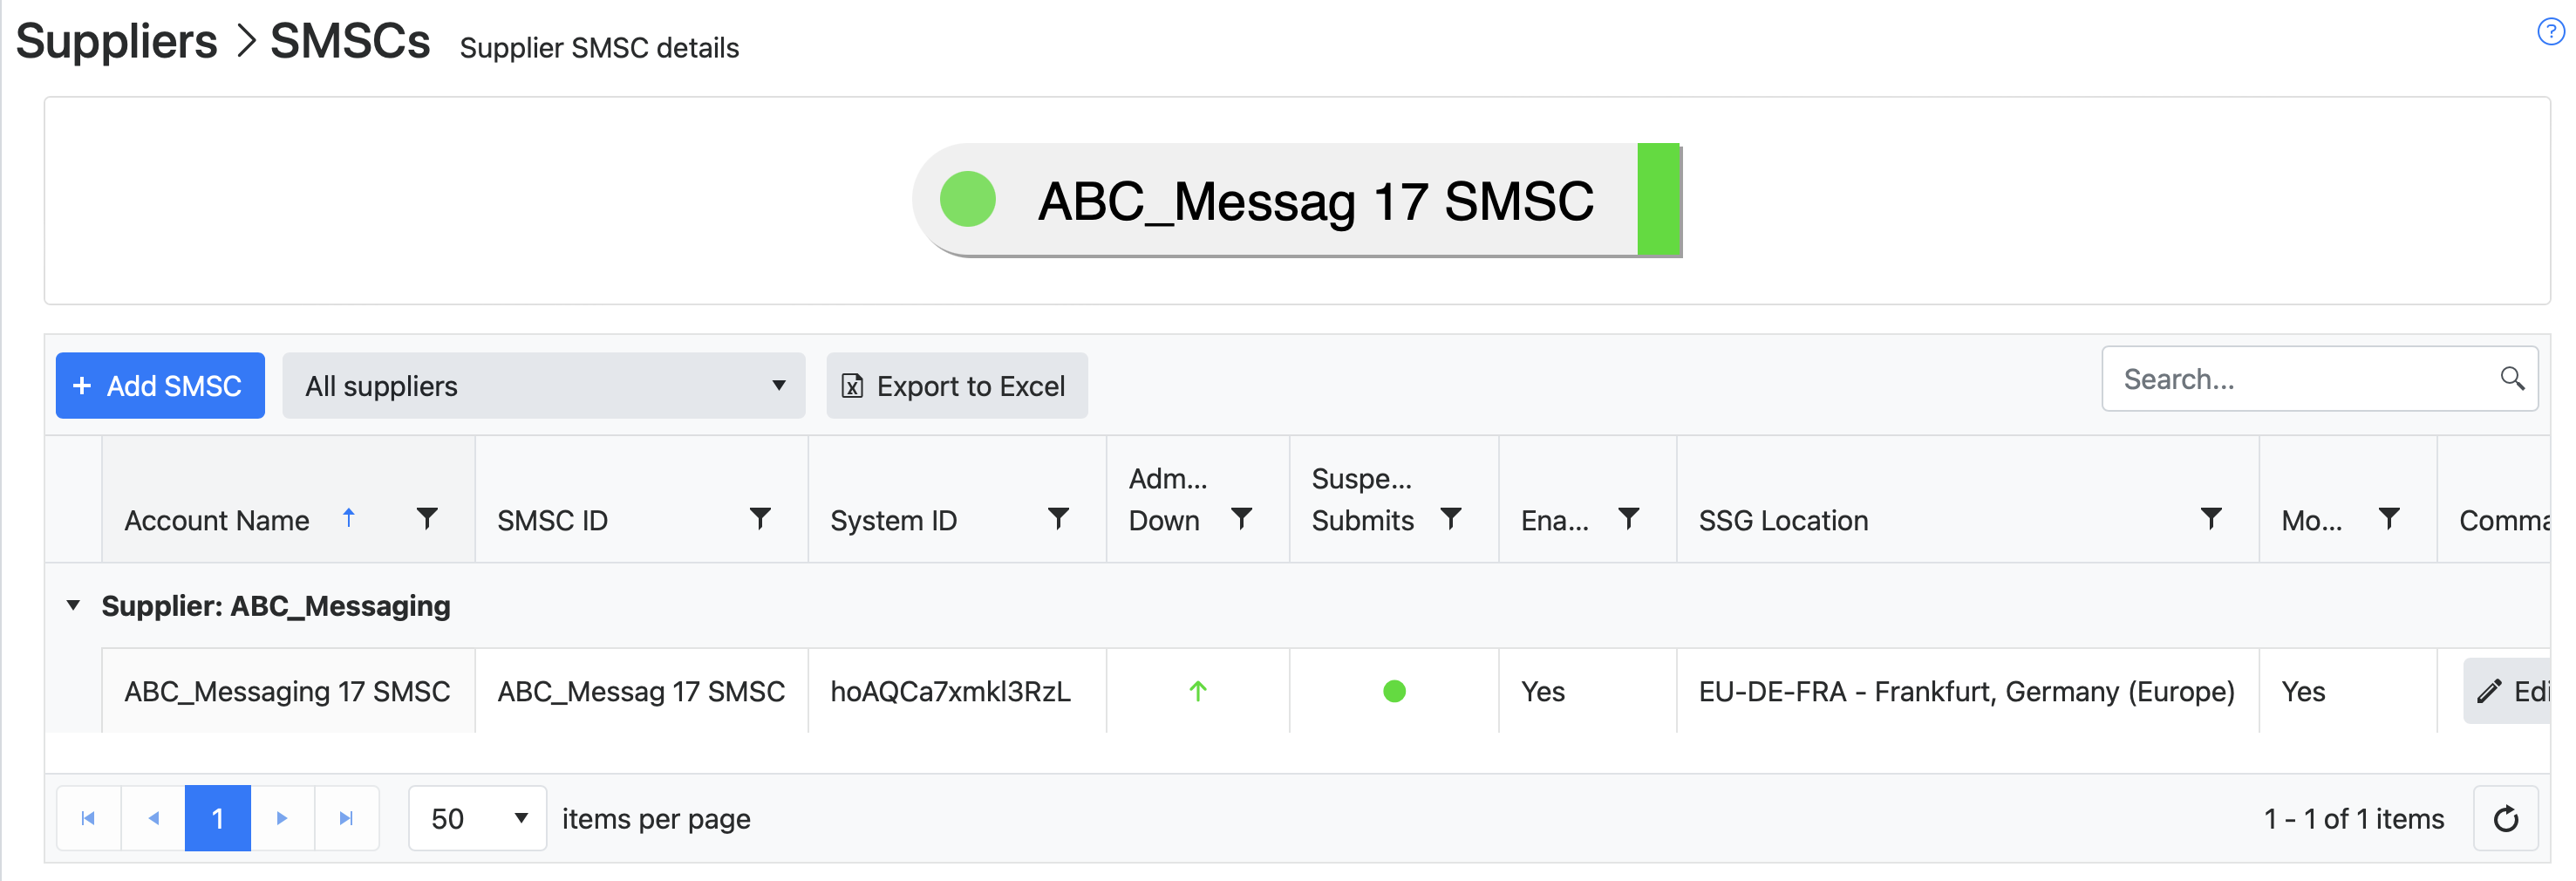
Go to the Suppliers > SMSCs section of the SSG Admin Portal.
The SMSCs section now shows the new SMSC connection:
New SMSC connection in SMSC connections table
The status area at the top of the page shows the SMSC connection and its state. The vertical rectangle on the right indicates if the SMSC connection is down (red) or up (green). The circle on the left indicates if the message submission to that SMSC connection has been manually suspended (red) or not suspended (green).
Double-click on the new entry in the table or click Edit to open the dialog showing the SMSC connection's details.
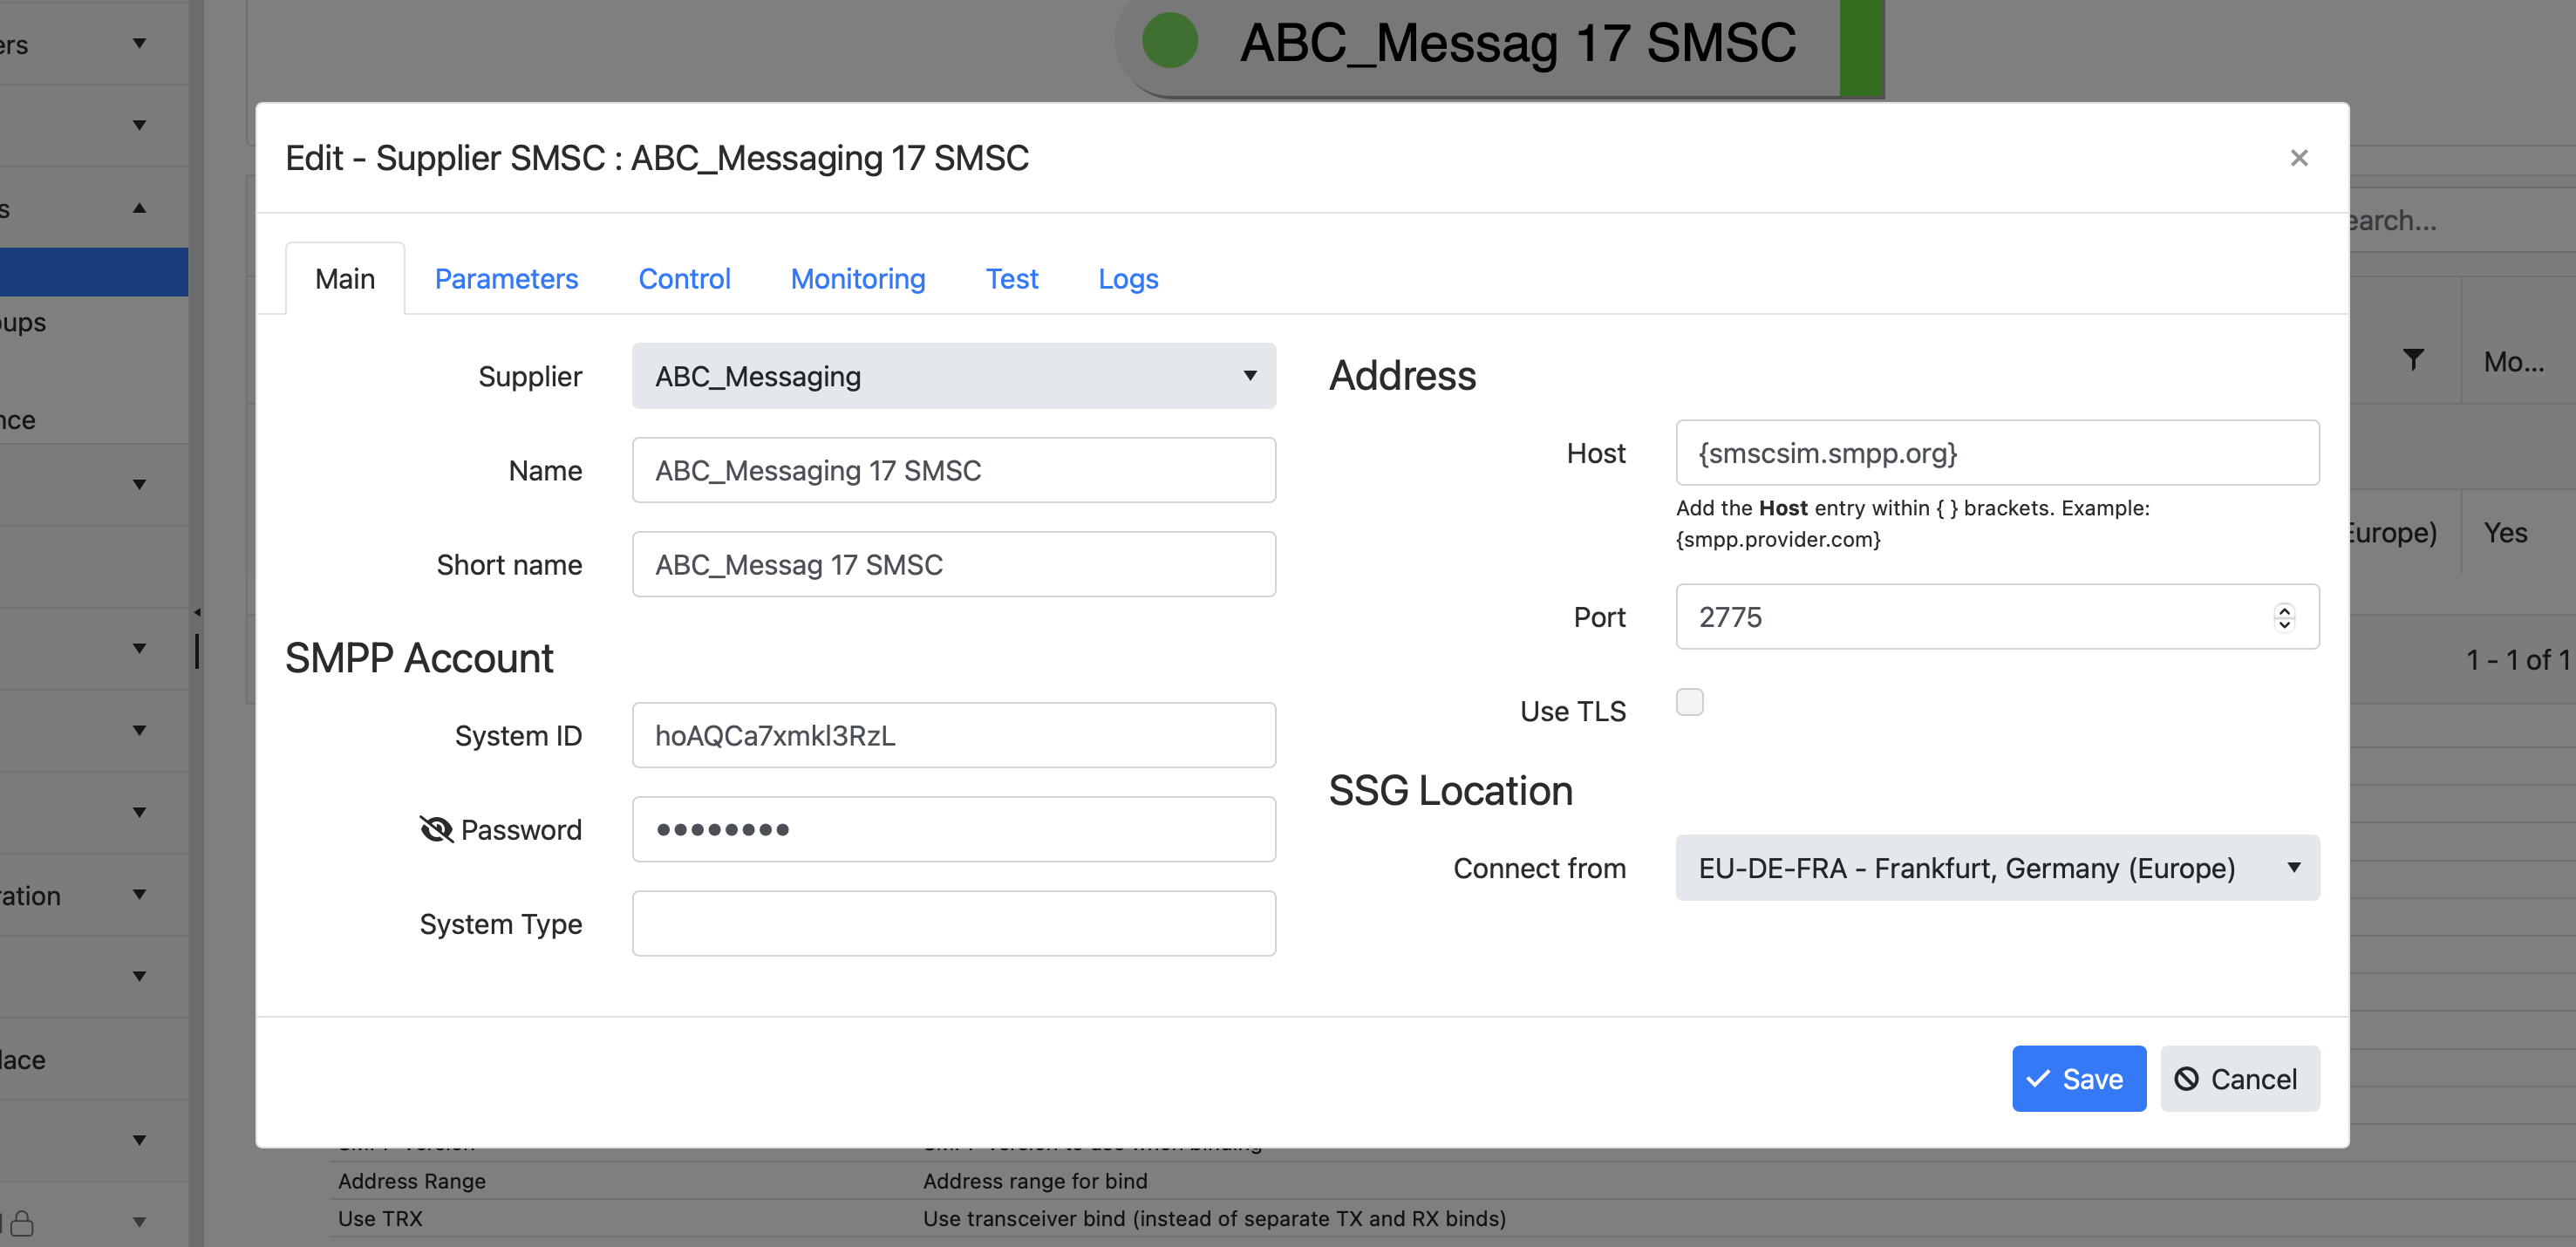
SMSC connection dialog
Click on the Logs tab to see the latest log entries for the new SMSC connection.
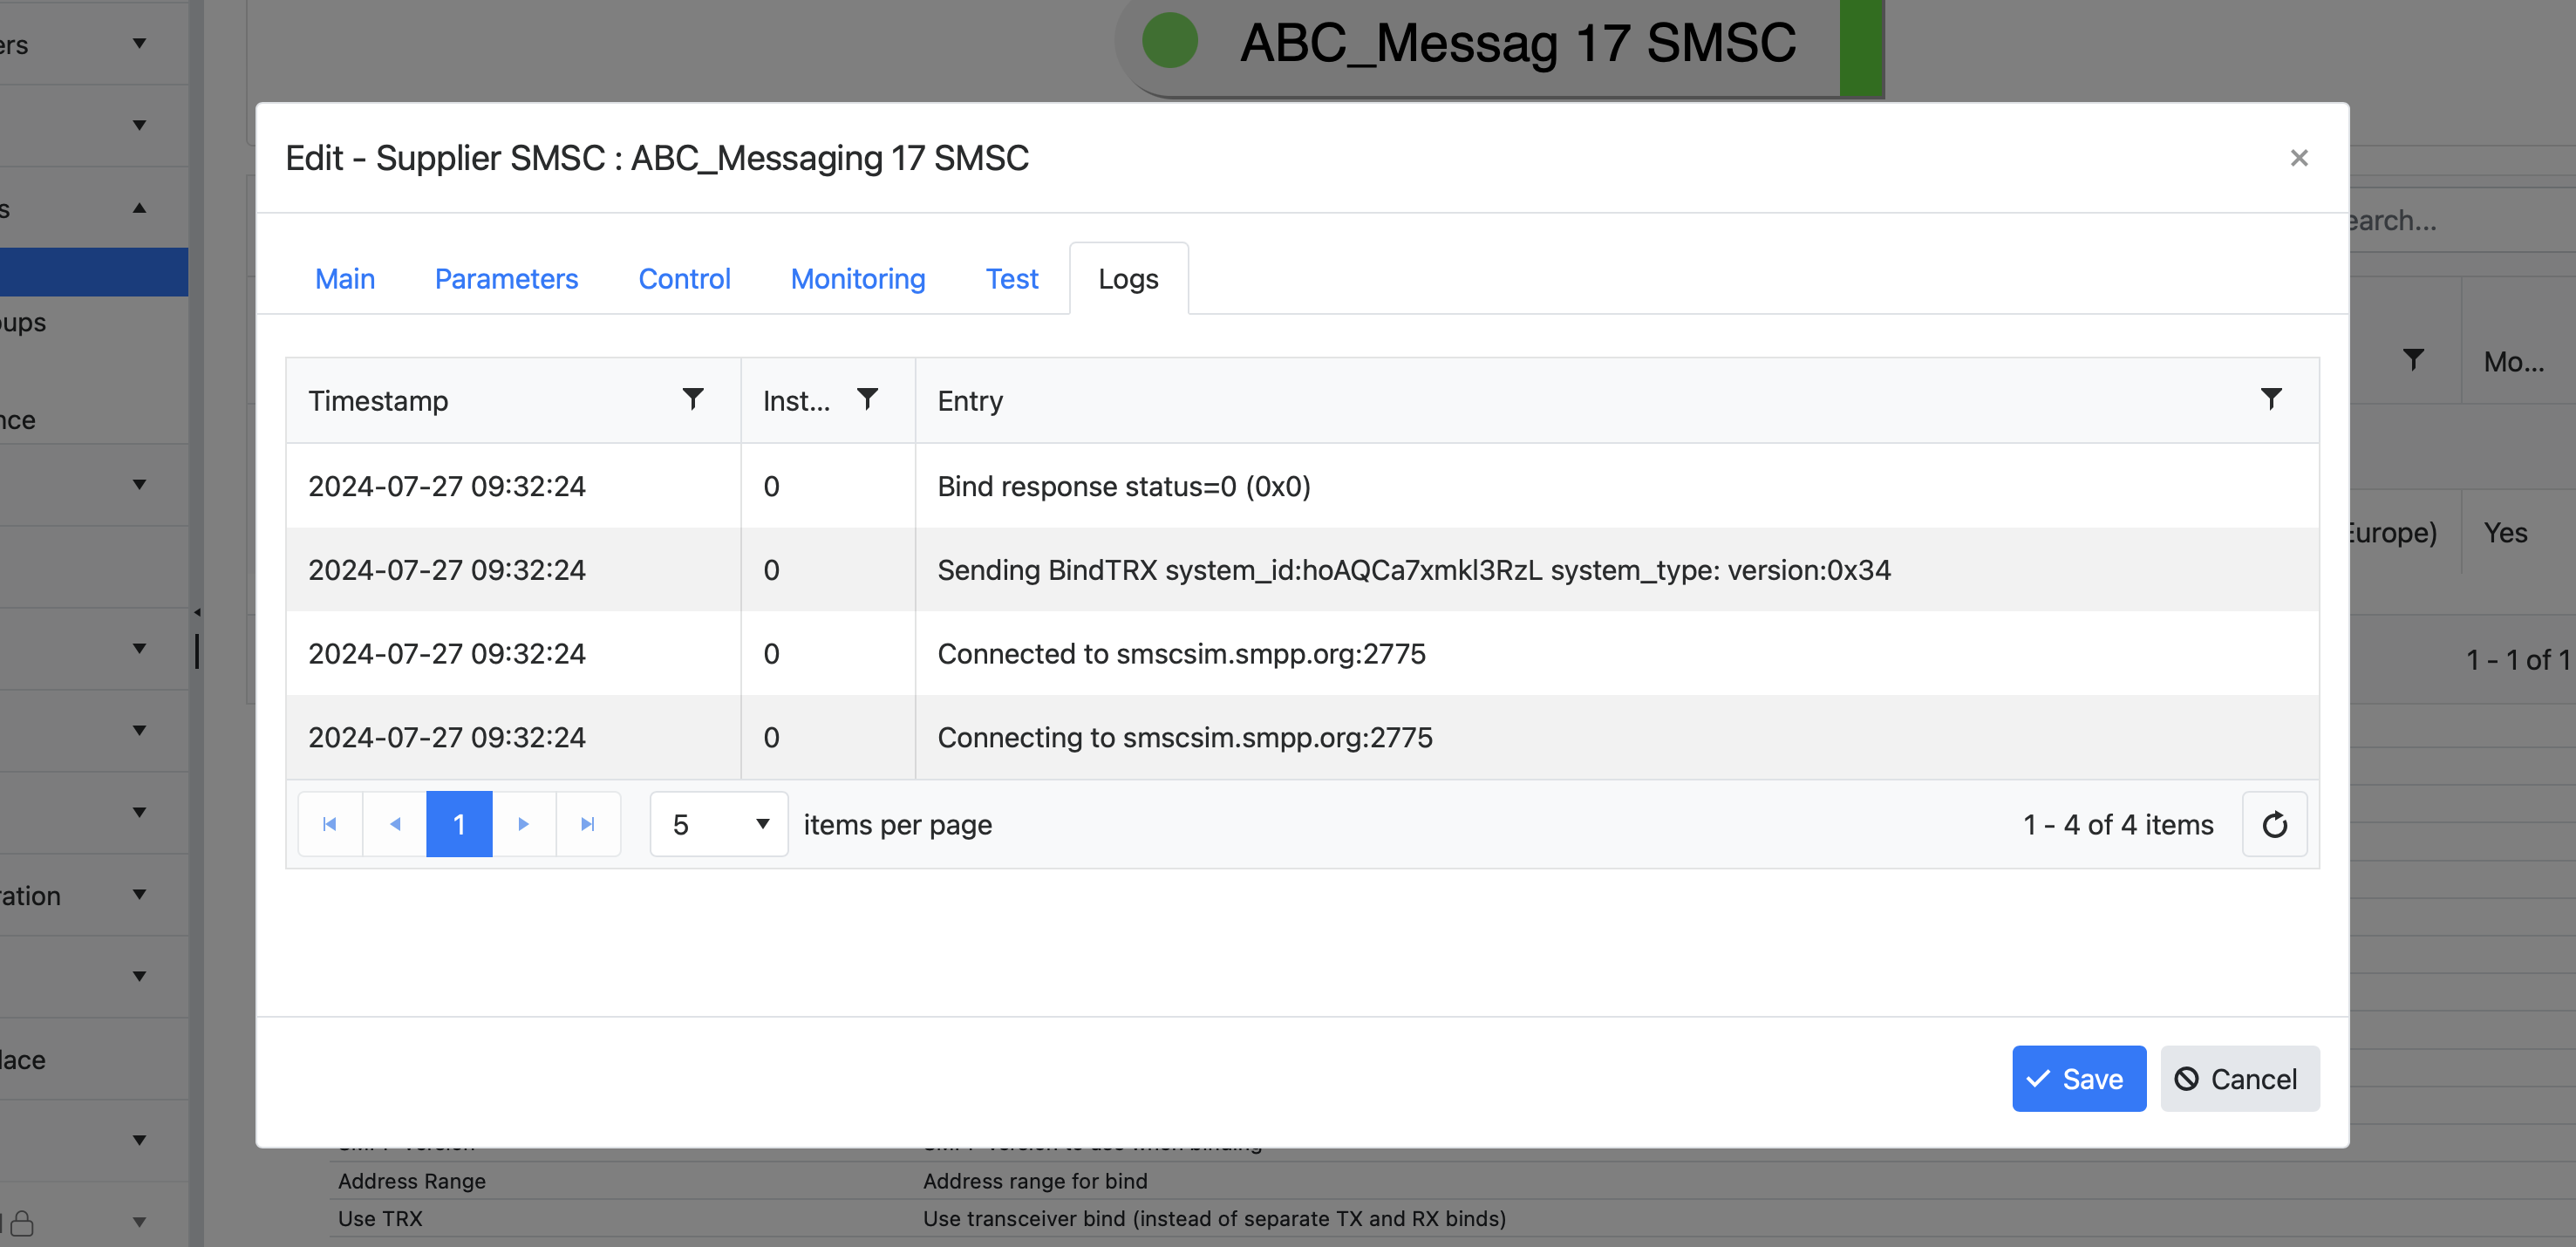
SMSC connection logs
A successful SMPP bind for the SMSC connection should show:
Bind response status=0 (0x0)This means that there was no error when attempting to bind. If any other status value is seen, you can check the meaning of the SMPP "command status" value at https://smpp.org/smpp-error-codes.html.
Make any necessary changes to the SMSC connection in each tab and then click Save. Click Cancel if not making any changes.
Go to the Suppliers > SMSC groups section of the SSG Admin Portal.
The SMSC groups section now shows the new SMSC group for the supplier and SMSC connection:
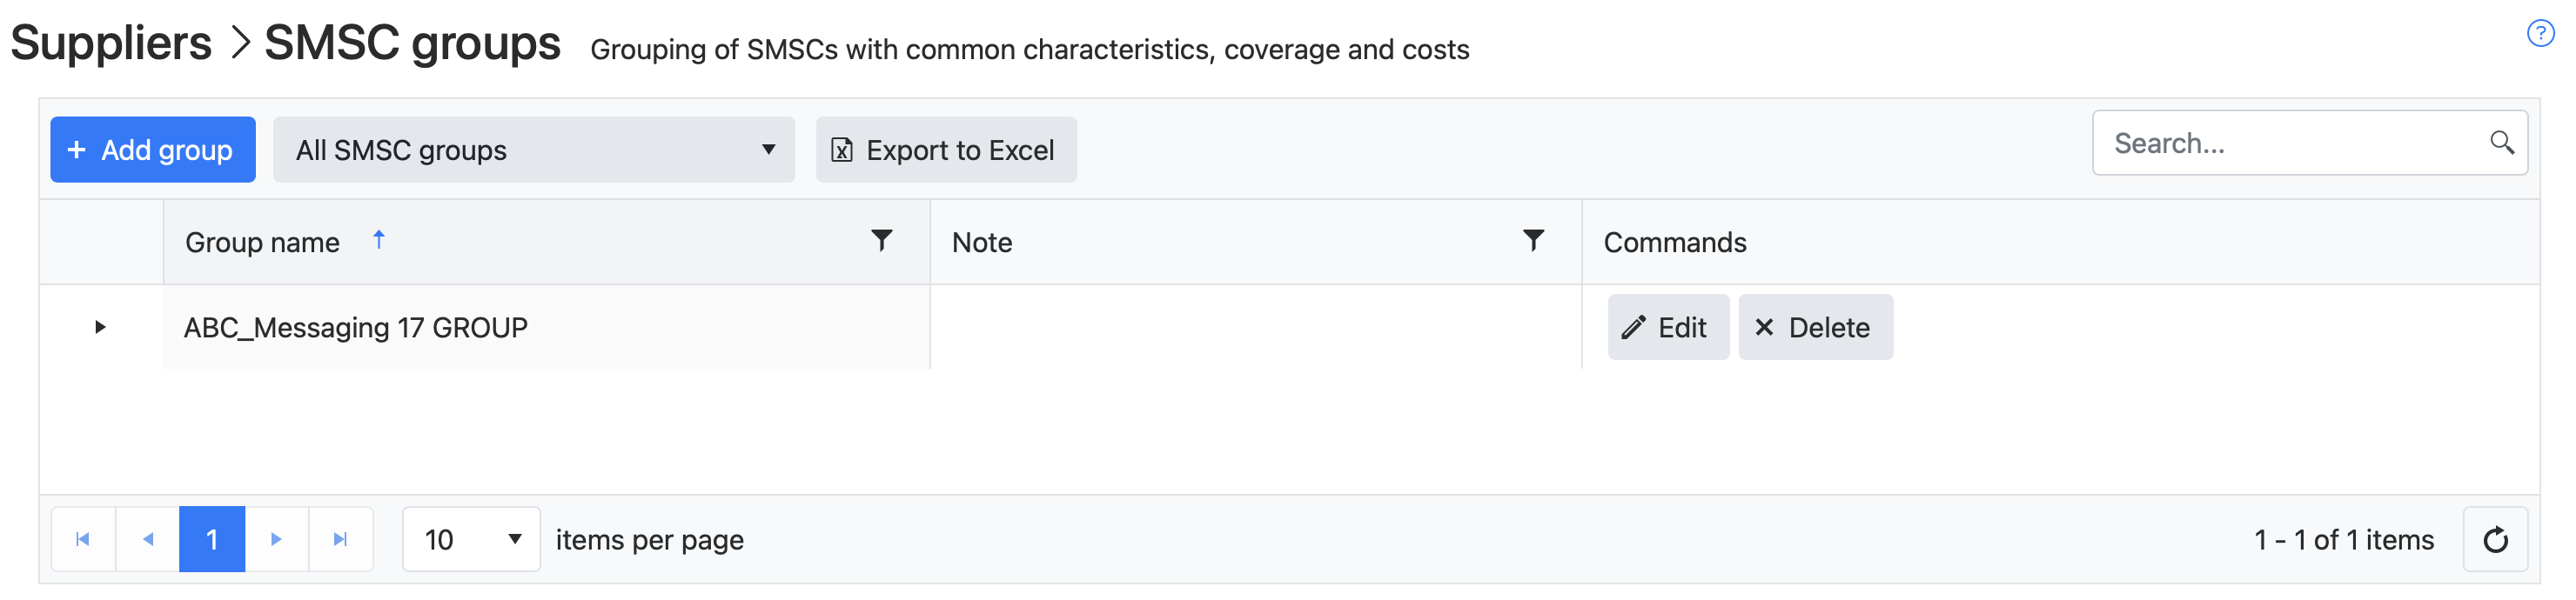
New SMSC group in SMSC groups table
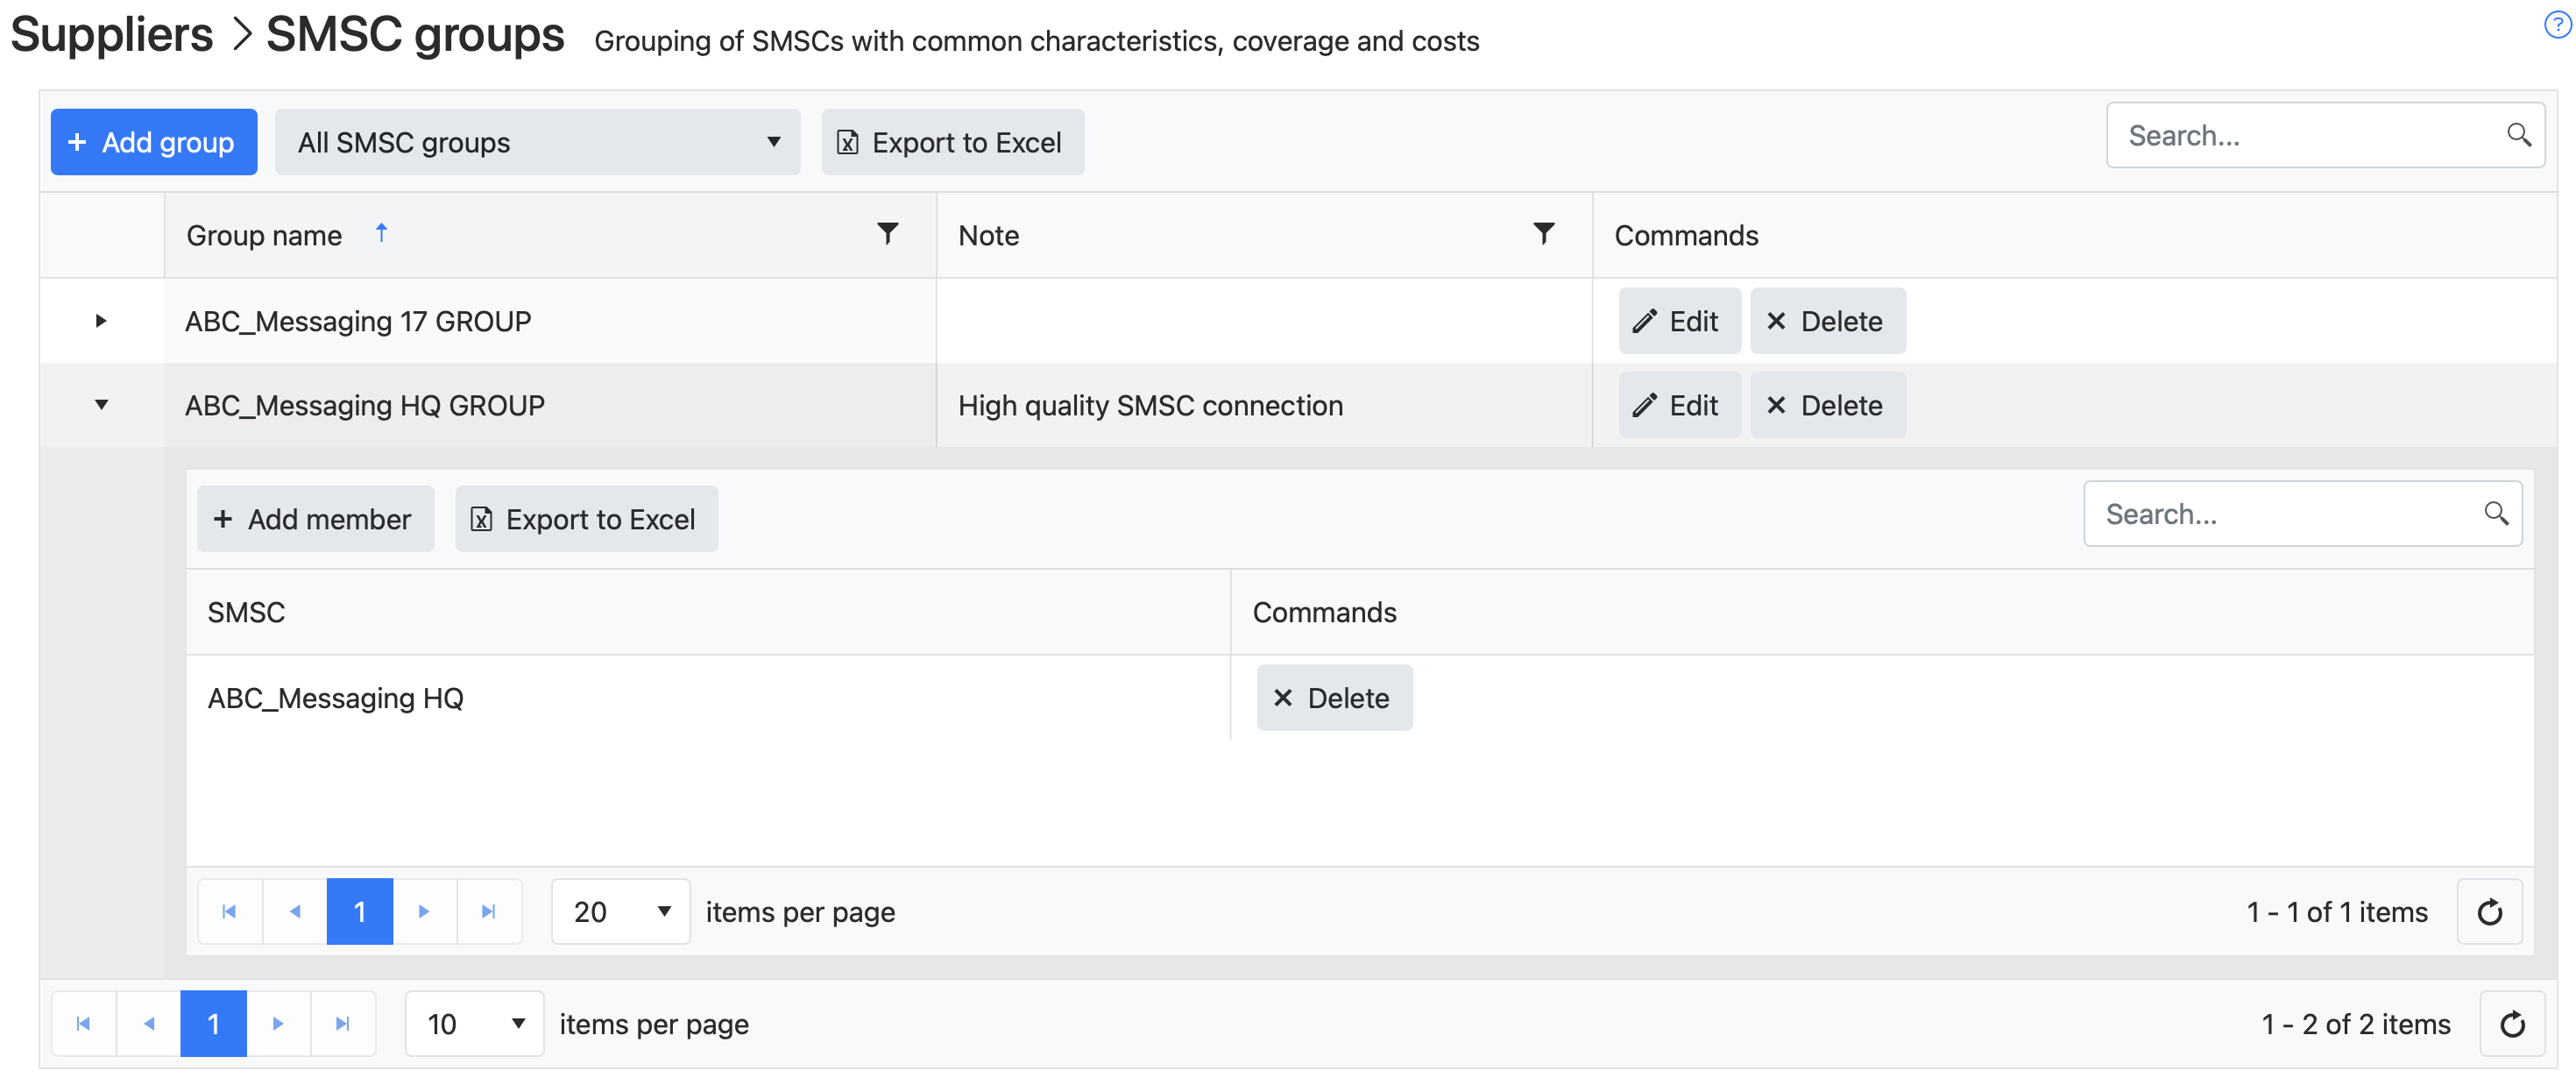
Click on the black arrow to the left of the new SMSC group entry to display the new SMSC connection as a member of the group.
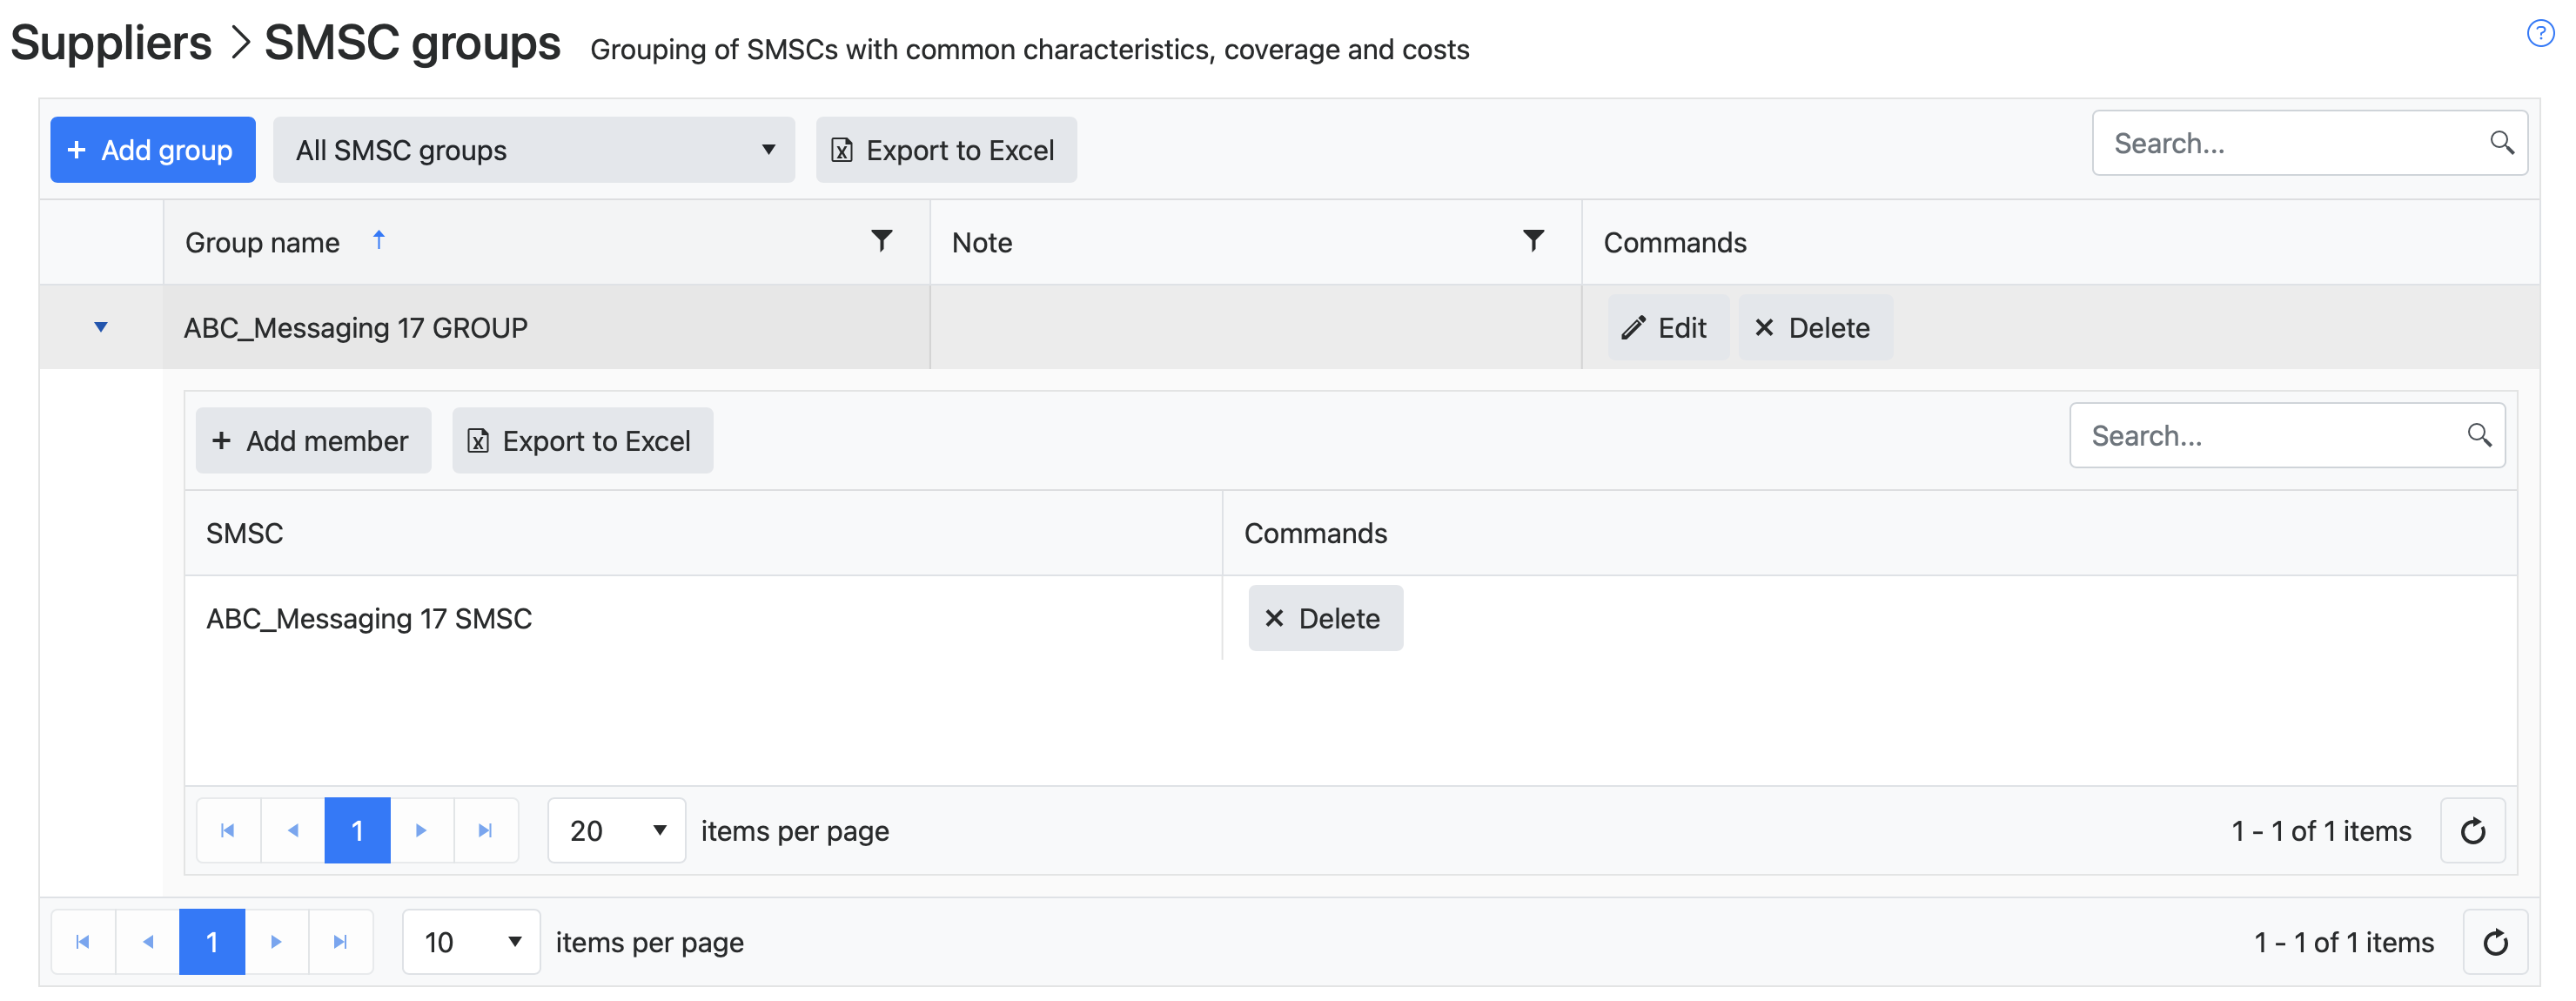
SMSC connection member of SMSC group
SMSC groups contain SMSC connections to the same service of a supplier. The SSG regards each SMSC connection in an SMSC group as the equivalent of the other SMSC connections in the same group. This applies to routing, coverage, performance and capability.
Add supplier SMSC connections
The "Quick Create Supplier+SMSC" wizard described above shows how to add a new supplier and SMSC connection at the same time. This part of the tutorial walks you through how to add a new SMSC connection to an existing supplier.
Go to the Suppliers > SMSCs section of the SSG Admin Portal.
Click on Add SMSC.
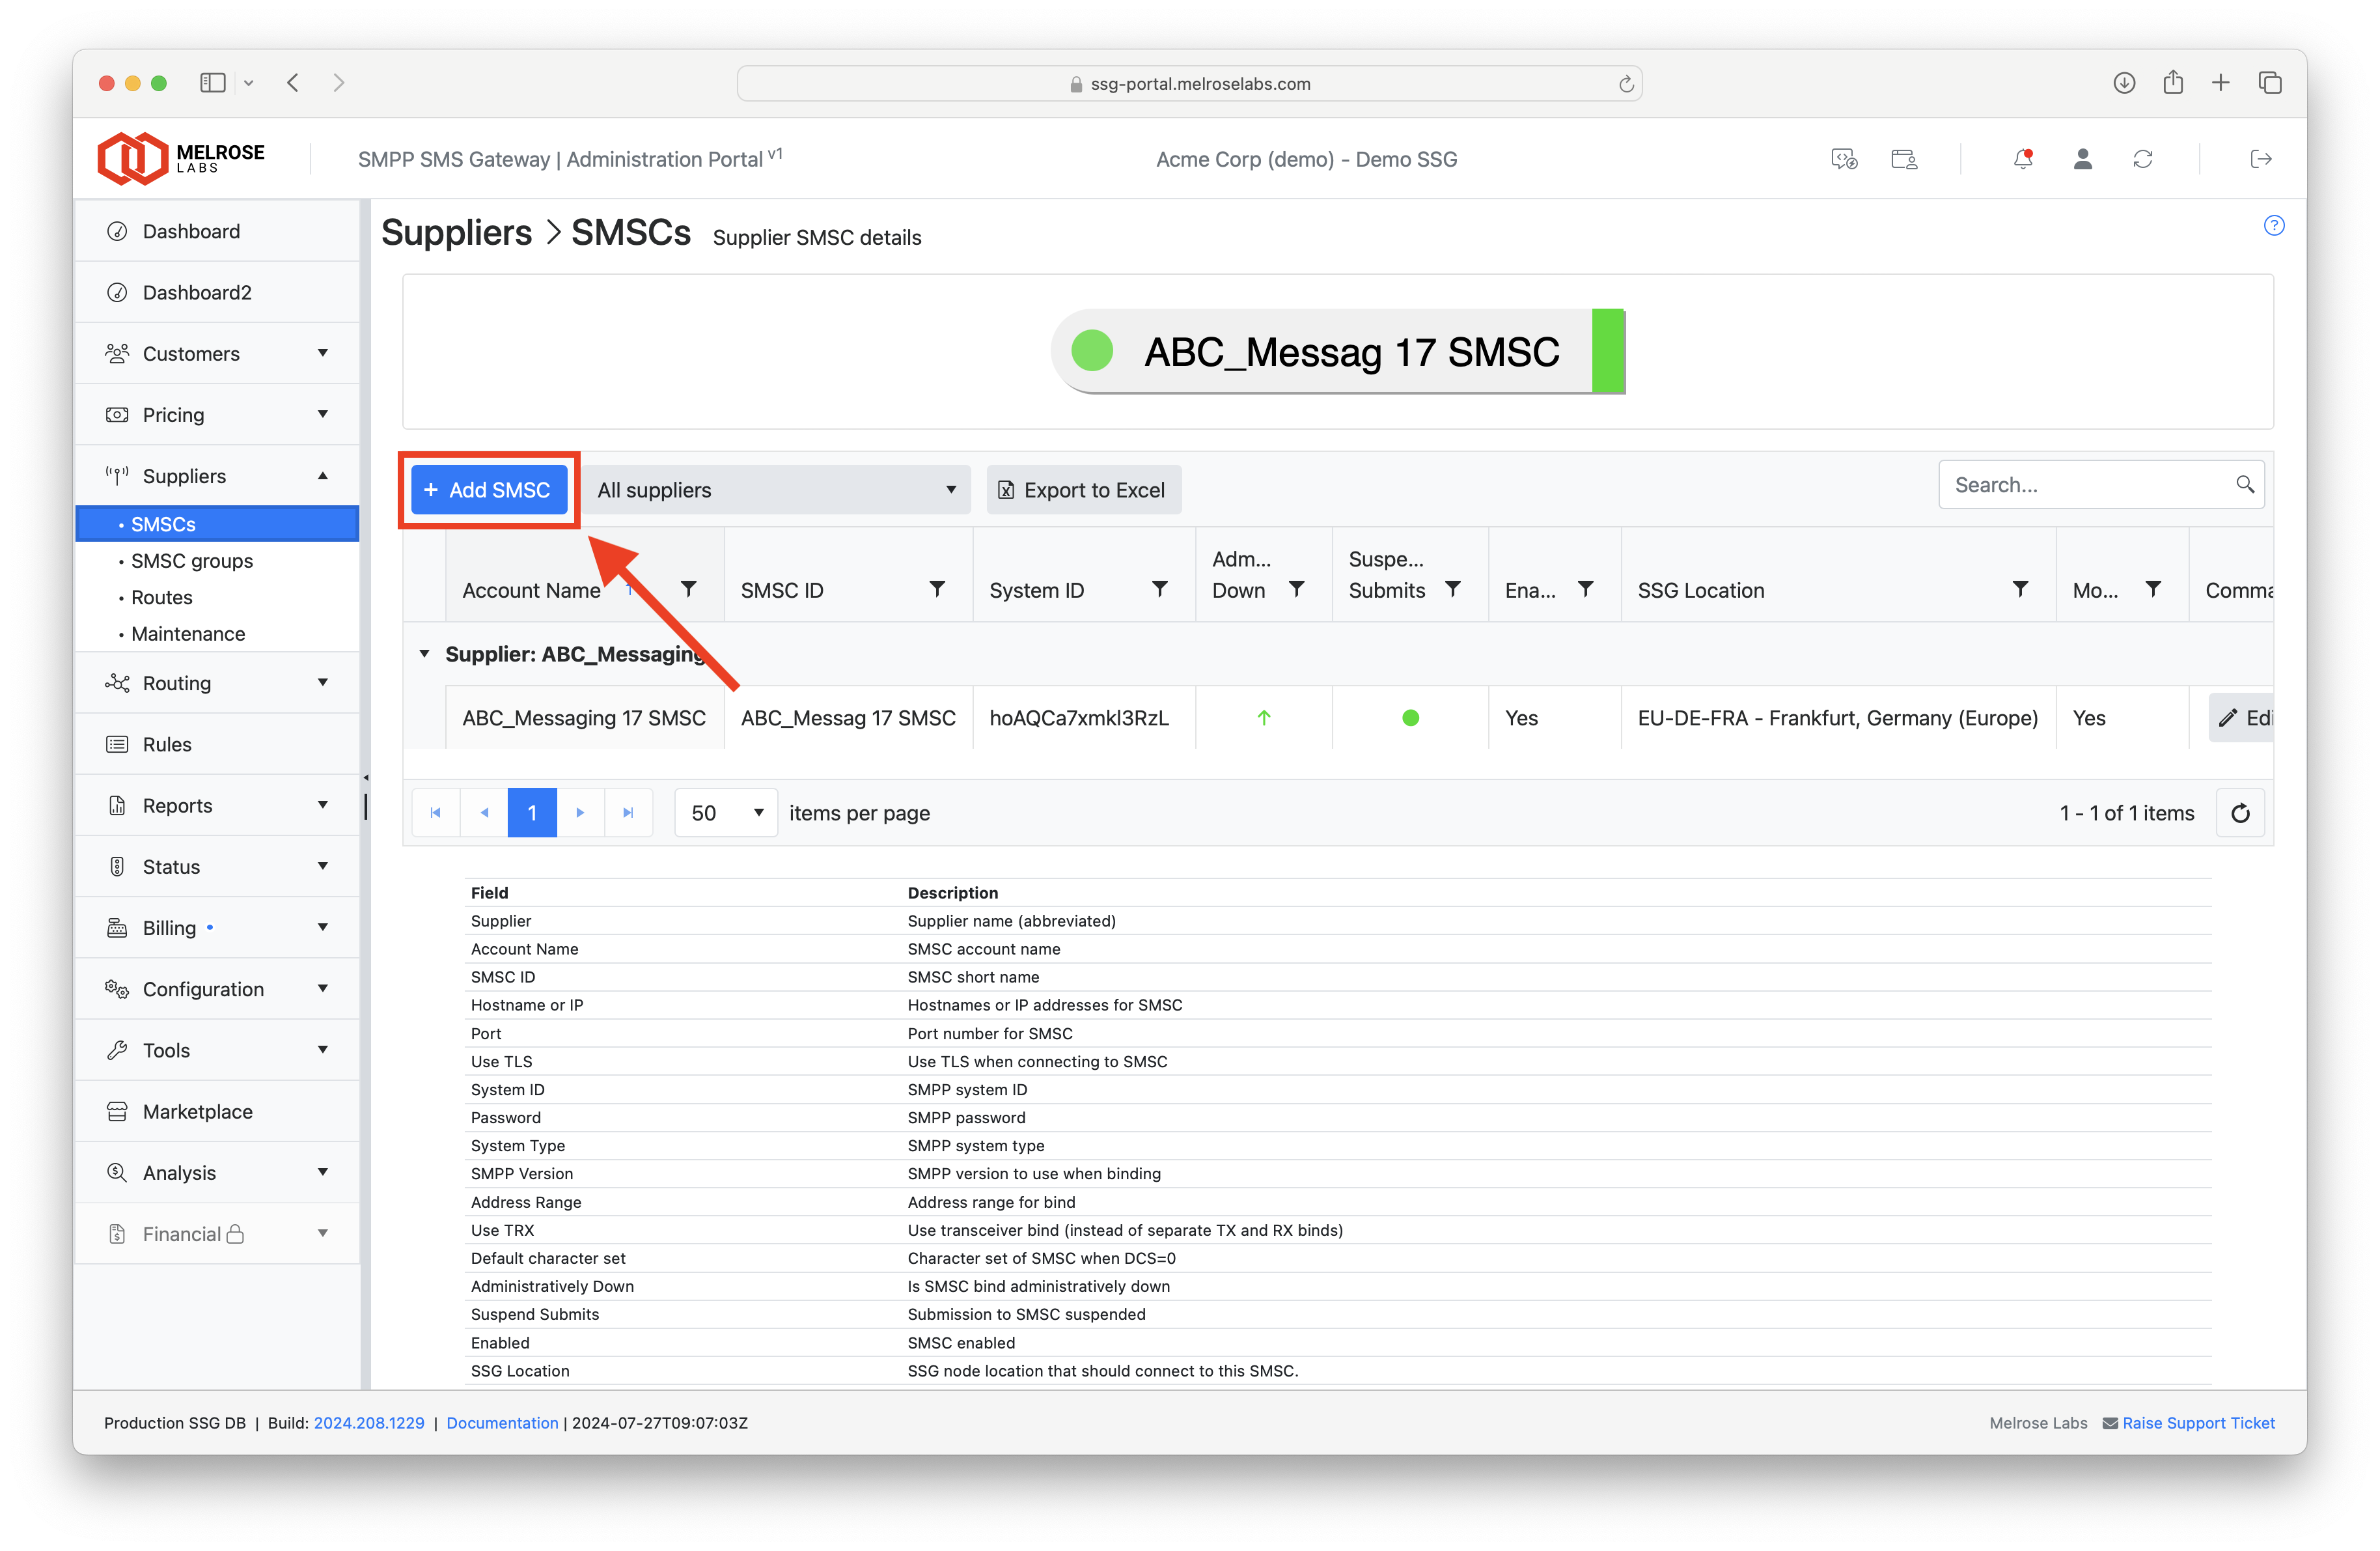
Add SMSC connection
A new SMSC connection dialog will display:
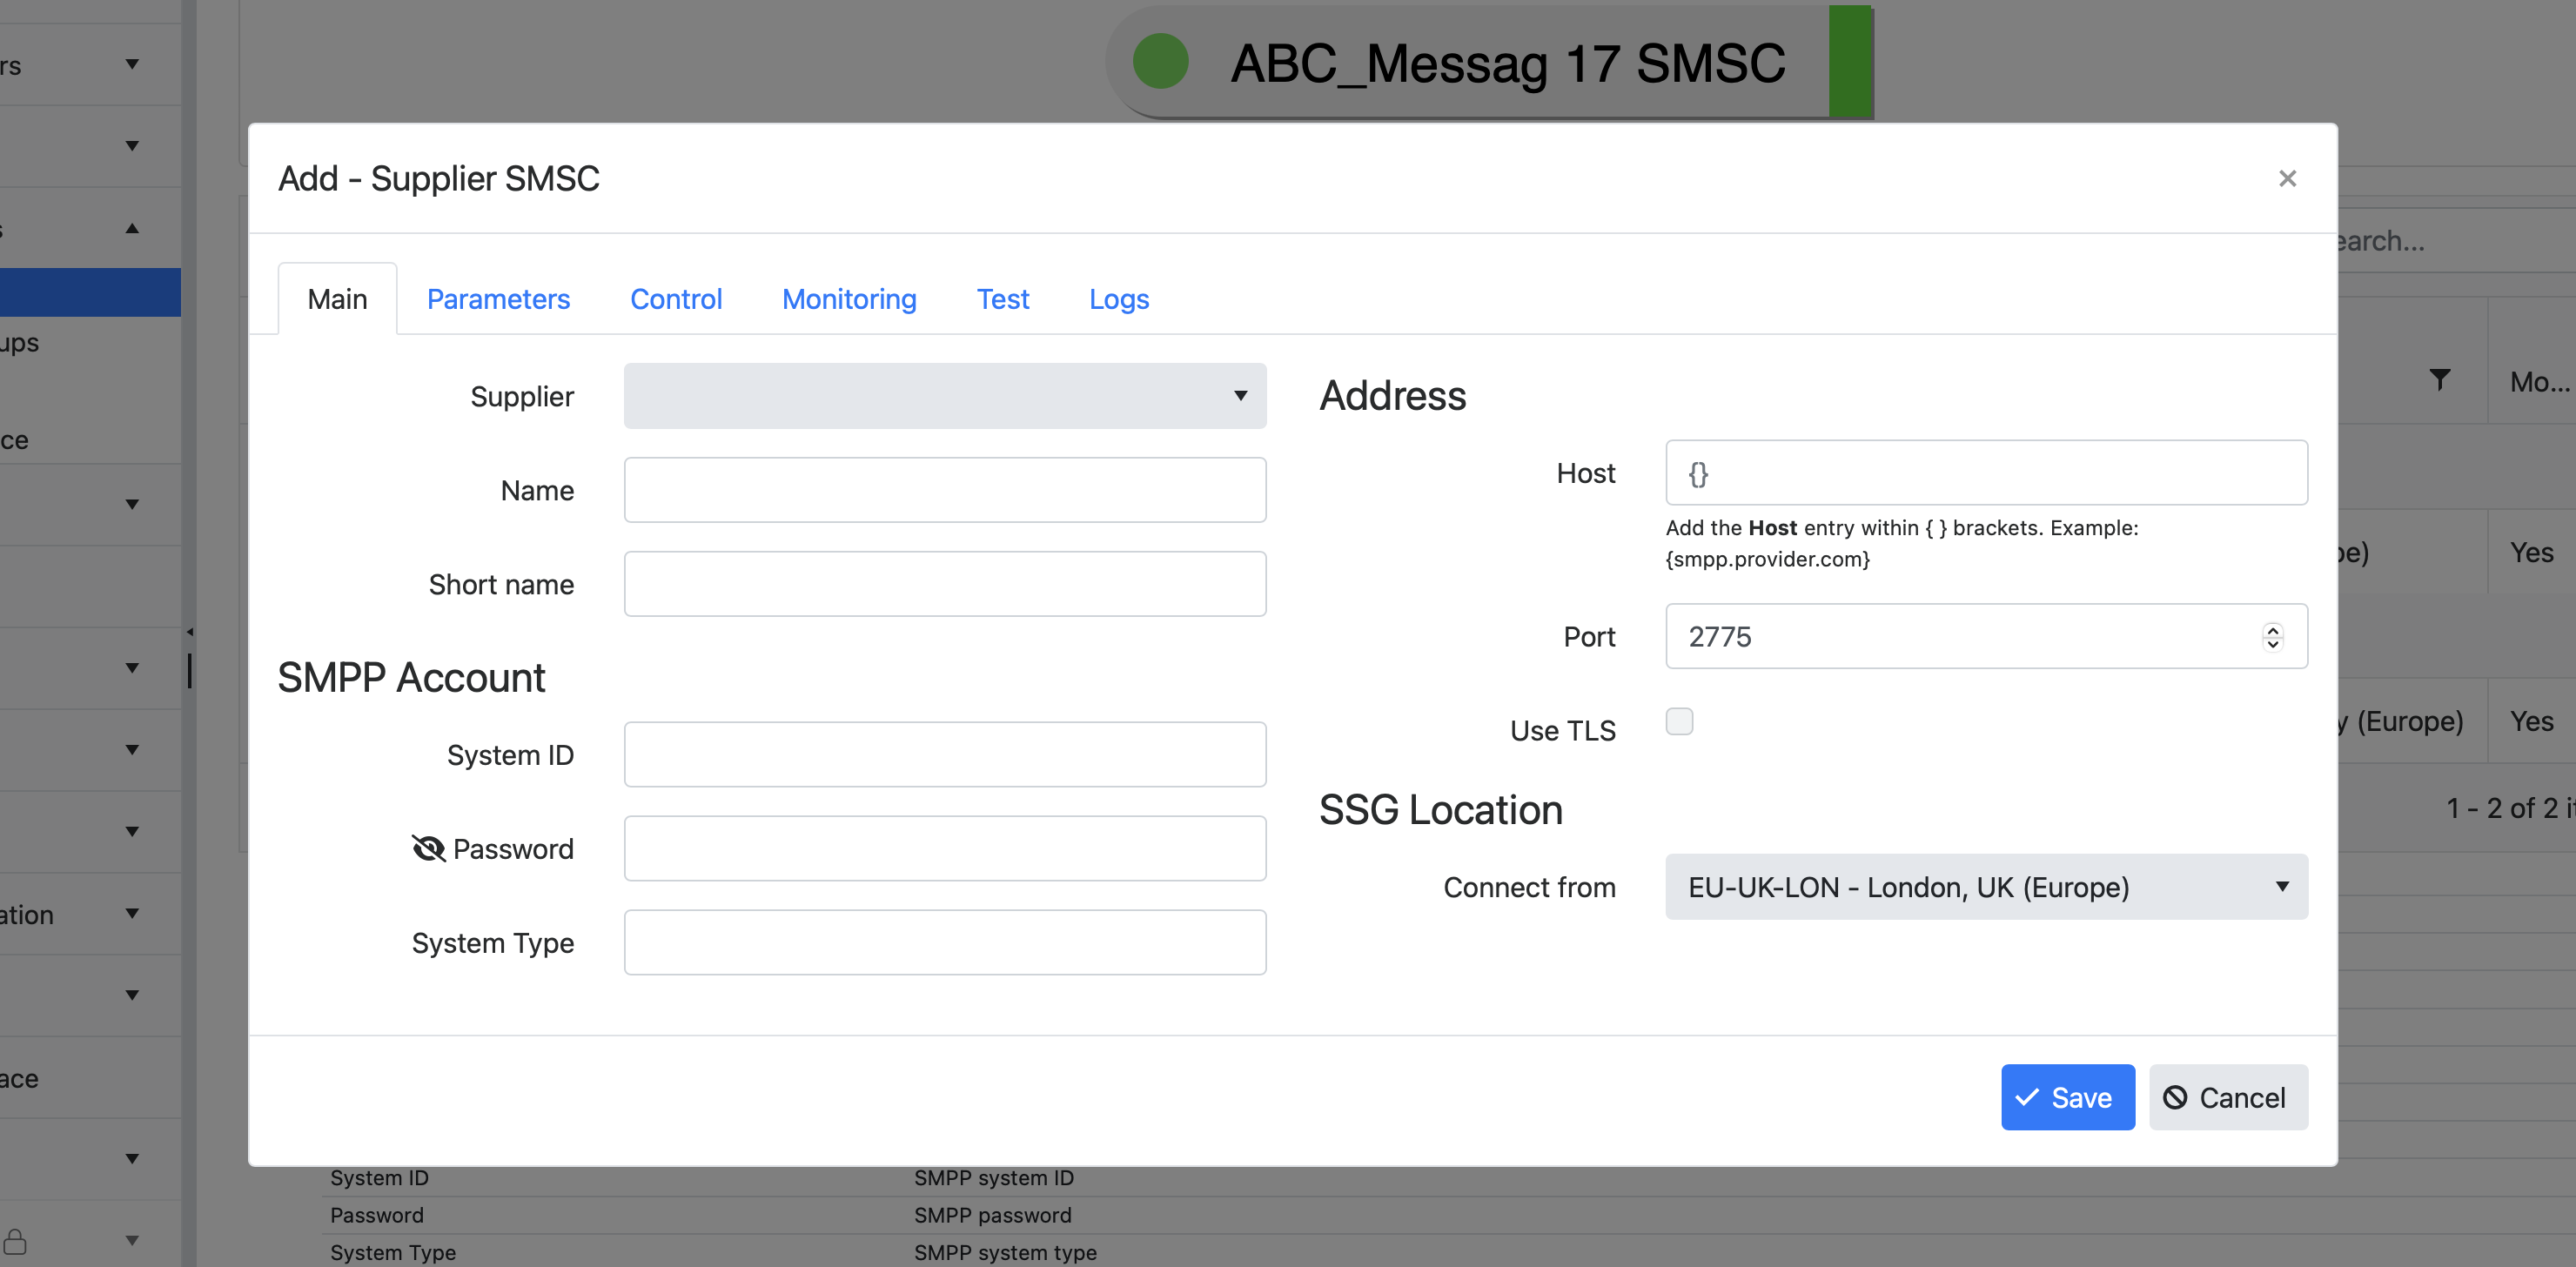
New SMSC connection dialog
Select the existing supplier name from the Supplier dropdown list.
Enter a name for the SMSC connection (e.g. ABC_Messaging HQ).
Enter a short name for the SMSC connection (e.g. ABC_Messag HQ). This is used in widgets, diagrams and elsewhere.
Enter the SMPP account details given to you by your supplier in the system ID, password, system type (if any), host and port. Note that the host must be included in curly brackets {} (e.g. {194.247.82.144}).
Select the SSG location where the connection should be made from to the supplier.
On the Parameters tab you can further configure the SMSC connection. For example, to set the number of binds to be made as part of the SMSC connection, change the "Maximum binds" to the number of binds required.
Click Save to add the SMSC connection.
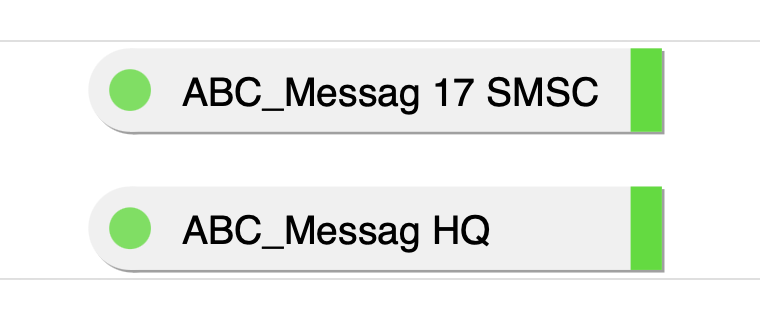
The new SMSC connection will be shown in the table and the SMSC's indicator will show at the top of the page.

New SMSC connection in SMSC connections table
The SMSC connection's indicator will turn green when the SMSC connection is up.
The SMSC connection is now UP but must be added to an SMSC group to be used in routing.
Go to the Suppliers > SMSC groups section of the SSG Admin Portal.
You can either add the new SMSC connection to an existing group or add it to a new SMSC group. For the purpose of this tutorial, we will add it to a new SMSC group.
Click "Add group".
Enter the group name and any descriptive note about this SMSC group (optional).

Click Save to add the new SMSC group.
Click on the black arrow to the left of the new SMSC group. You will see no SMSCs in the new SMSC group.
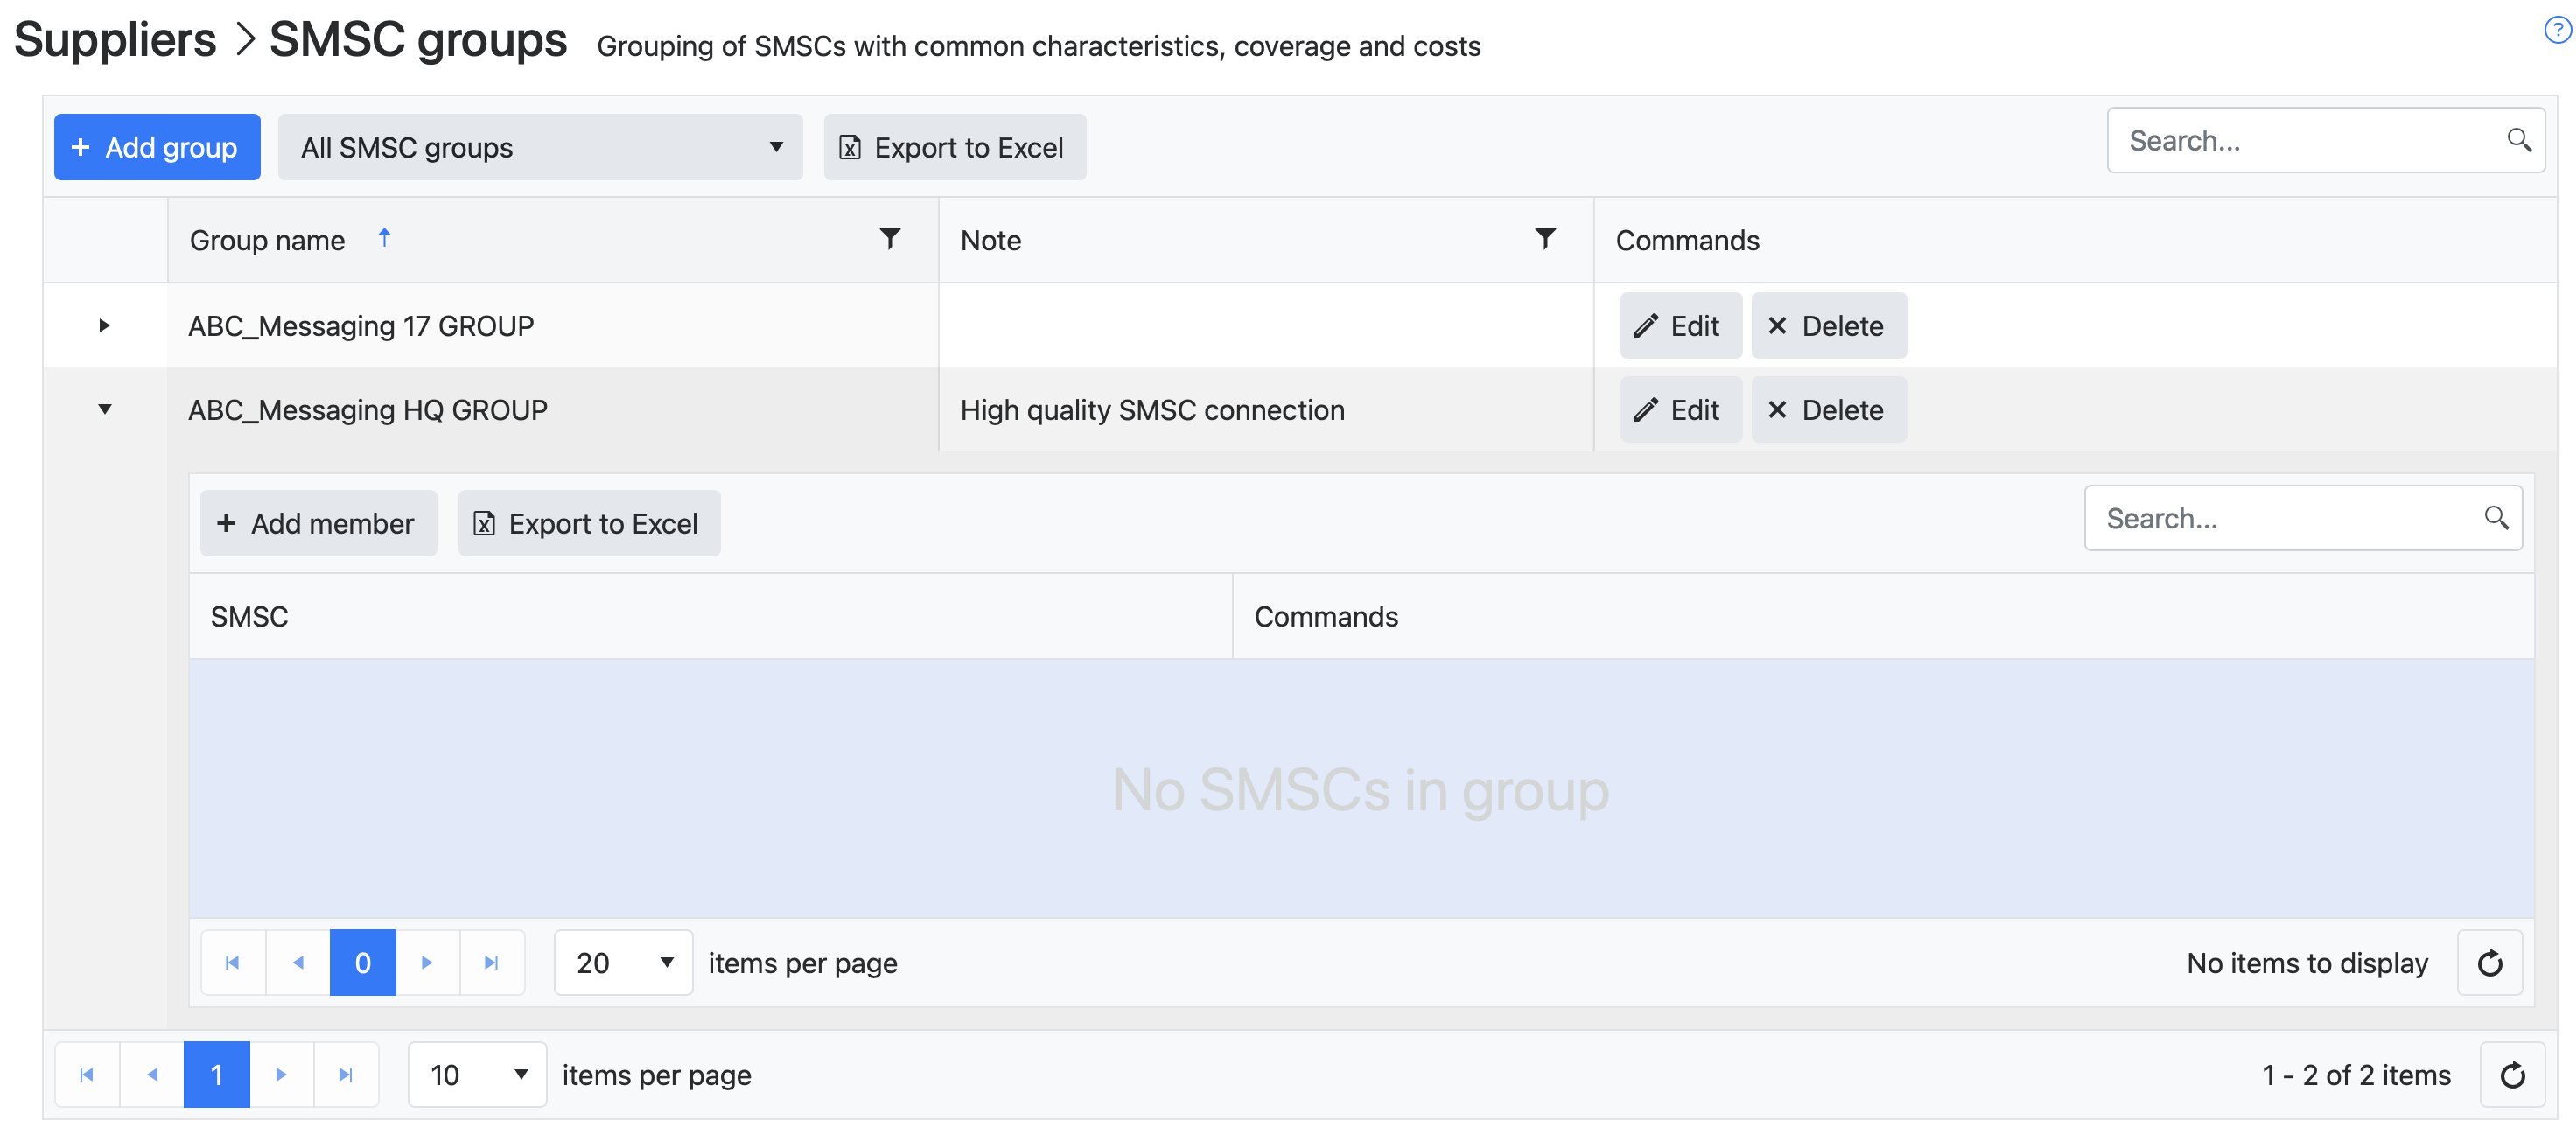
Click "Add member".
Select the new SMSC connection from the dropdown list.
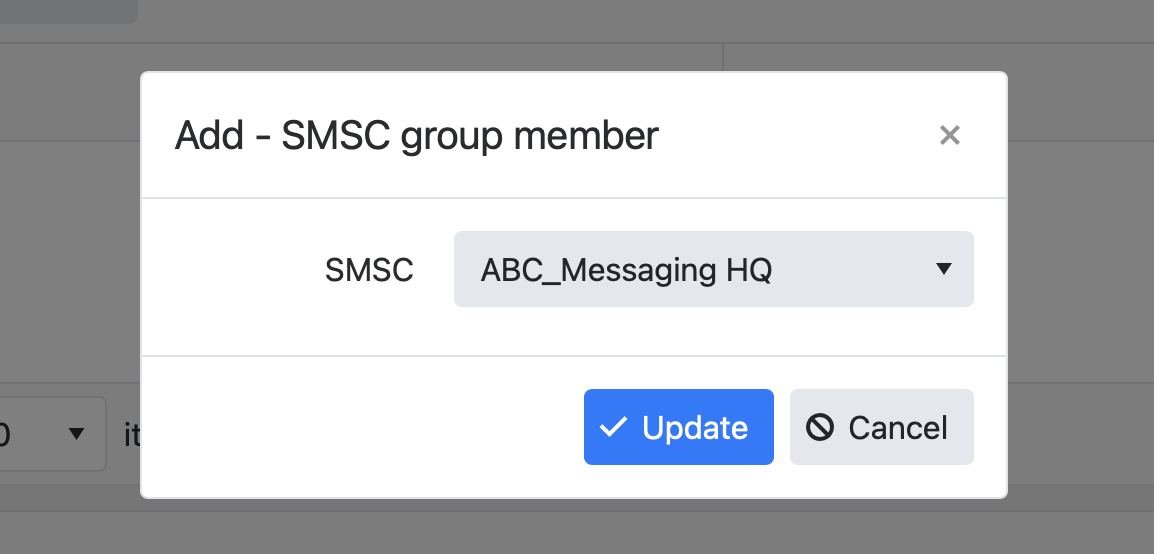
Click Update.
The new SMSC connection is now shown as a member of the new SMSC group.
Adding supplier coverage and costs
Supplier coverage and route costs are added in the Suppliers > Routes section.
Add new individual route
A new individual route (i.e. single network or country) can be added using the "Add route" dialog.
Go to the Suppliers > Routes section.
Click "Add route".
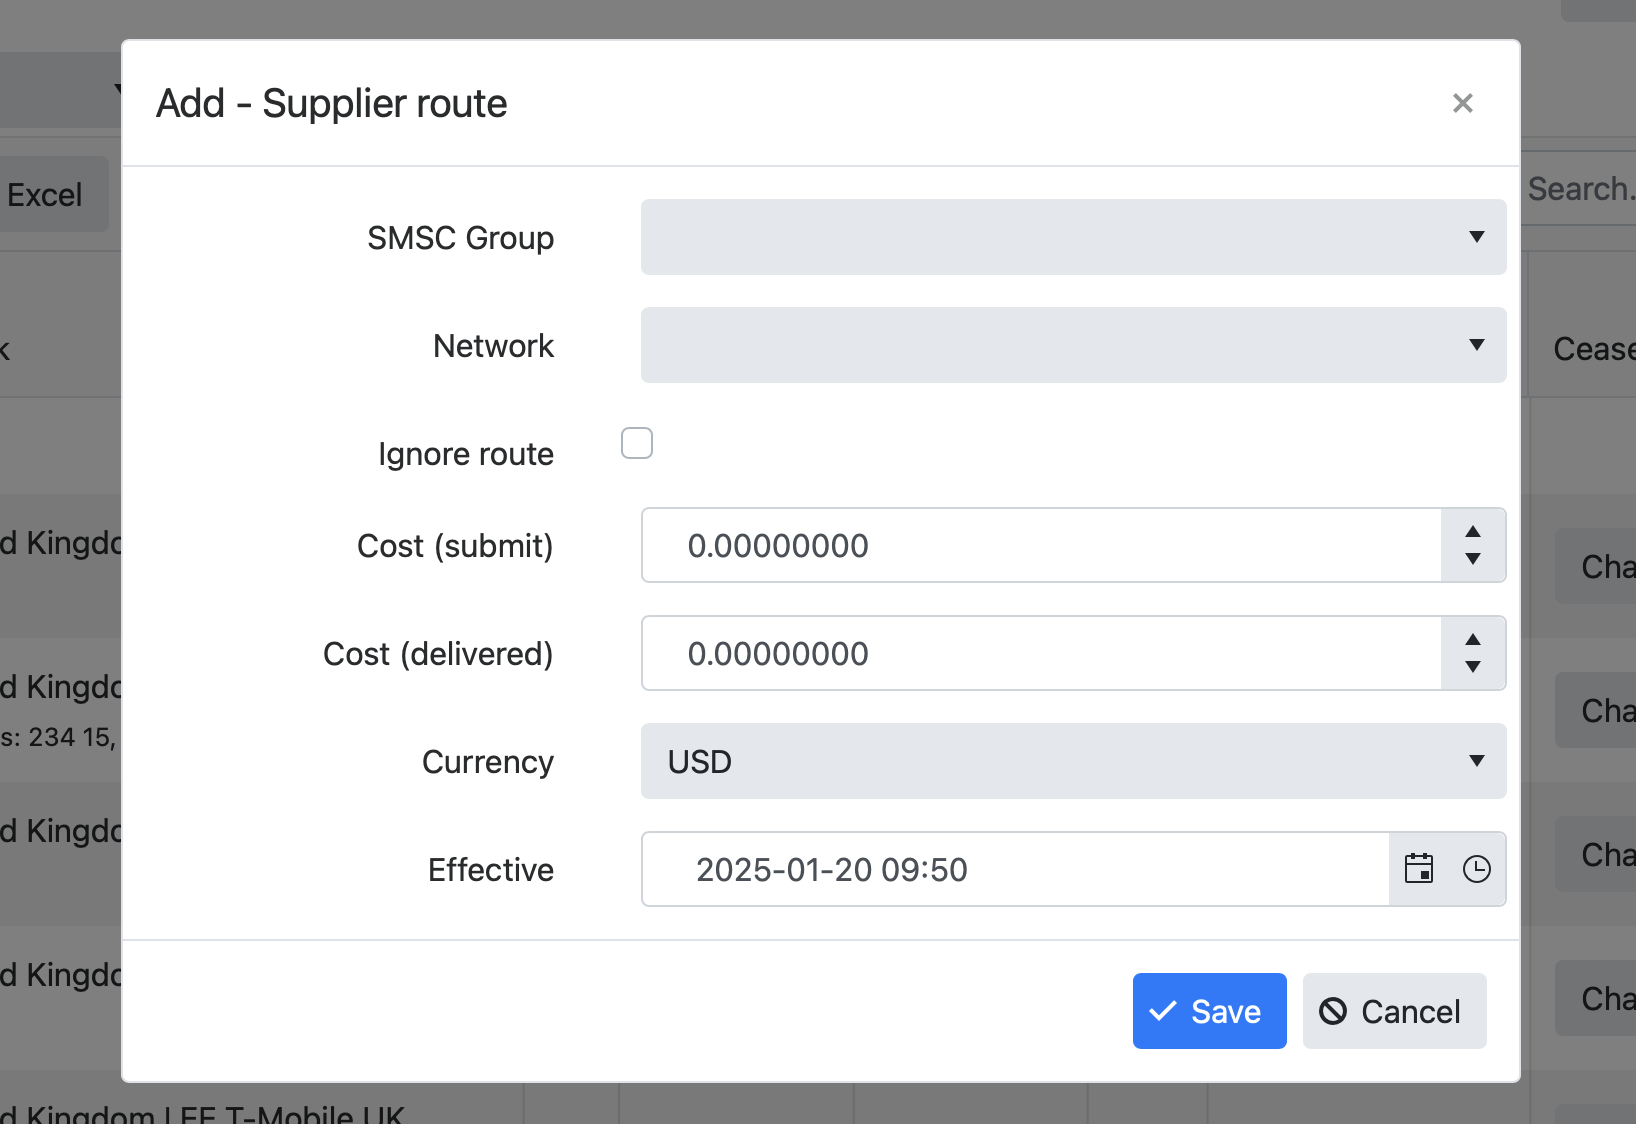
Select the SMSC Group that the route to which the supplier's route should be added.
Note: This will be the SMSC group that contains one or more relevant SMSC connections from the supplier.
Select the Network for the route.
Note: For a single route that includes all networks in the country, you can selected the "default" network for that country.
Enter the cost in "Cost (submit)" or "Cost (delivered)", depending on whether the cost is based on submission or delivery.
Select the currency for the cost.
Enter the Effective date/time for when the route is available at this cost or leave if available immediately.
Click "Save"
Modifying individual route cost
If the route costs changes in the future, use the "Change cost" button to modify the cost, current and effective date/time.
Add multiple routes
See https://ssgdocs.melroselabs.com/docs/routes#upload-smsc-group-pricing for uploading supplier coverage and costs (Upload SMSC Group Pricing).
Configuration parameters
Controlling connection
Reporting
Monitoring
Troubleshooting
Updated about 1 year ago