

Campaign
Marketing campaign creation and tracking
The Campaign application allows the sending of targeted messages to audiences based on predefined contact lists that include mobile numbers and, optionally, other relevant details. These messages contain a clickable web link (URL) that directs recipients to a specific web page. Tracking clicks on the link provides valuable engagement metrics.
The application is accessed in the Send Messages > Campaign section.
The steps for sending a message to a list of mobile contacts are:
- upload a contacts list (if not already uploaded)
- select contacts list(s) in To field
- enter message and include the text "{url}"
- enter the target URL to where the mobile user should be directed
- click Send Now button
Contacts
Contacts can be uploaded in the Send Messages > Campaign > Contacts section. Either drop a CSV file into the dotted area under "Add contact list" or click its "Upload contacts" button. A name for the contact list can optionally be provided - if none is provided, the filename of the uploaded file is used.
The first field in each line of the CSV file must contain the mobile number. Additional fields may include details such as names or other information. These details can be inserted into the message by referencing the field number within curly brackets (e.g. use "{2}" to include the second field after the mobile number).
Example of contacts list containing only mobile numbers:
447700000000
447700000001
447700000002
447700000003
447700000004
447700000005
Example of contacts list containing mobile number and other details for each contact:
MobileNo,FirstName,LastName
447700000000,Tom,Smith
447700000001,Peter,Lane
447700000002,Mark,Jones
447700000003,Jim,Barns
447700000004,Alexa,Norris
447700000005,Zack,Chip
By clicking the "Message" button in the table of contacts, you can start to compose a new campaign.
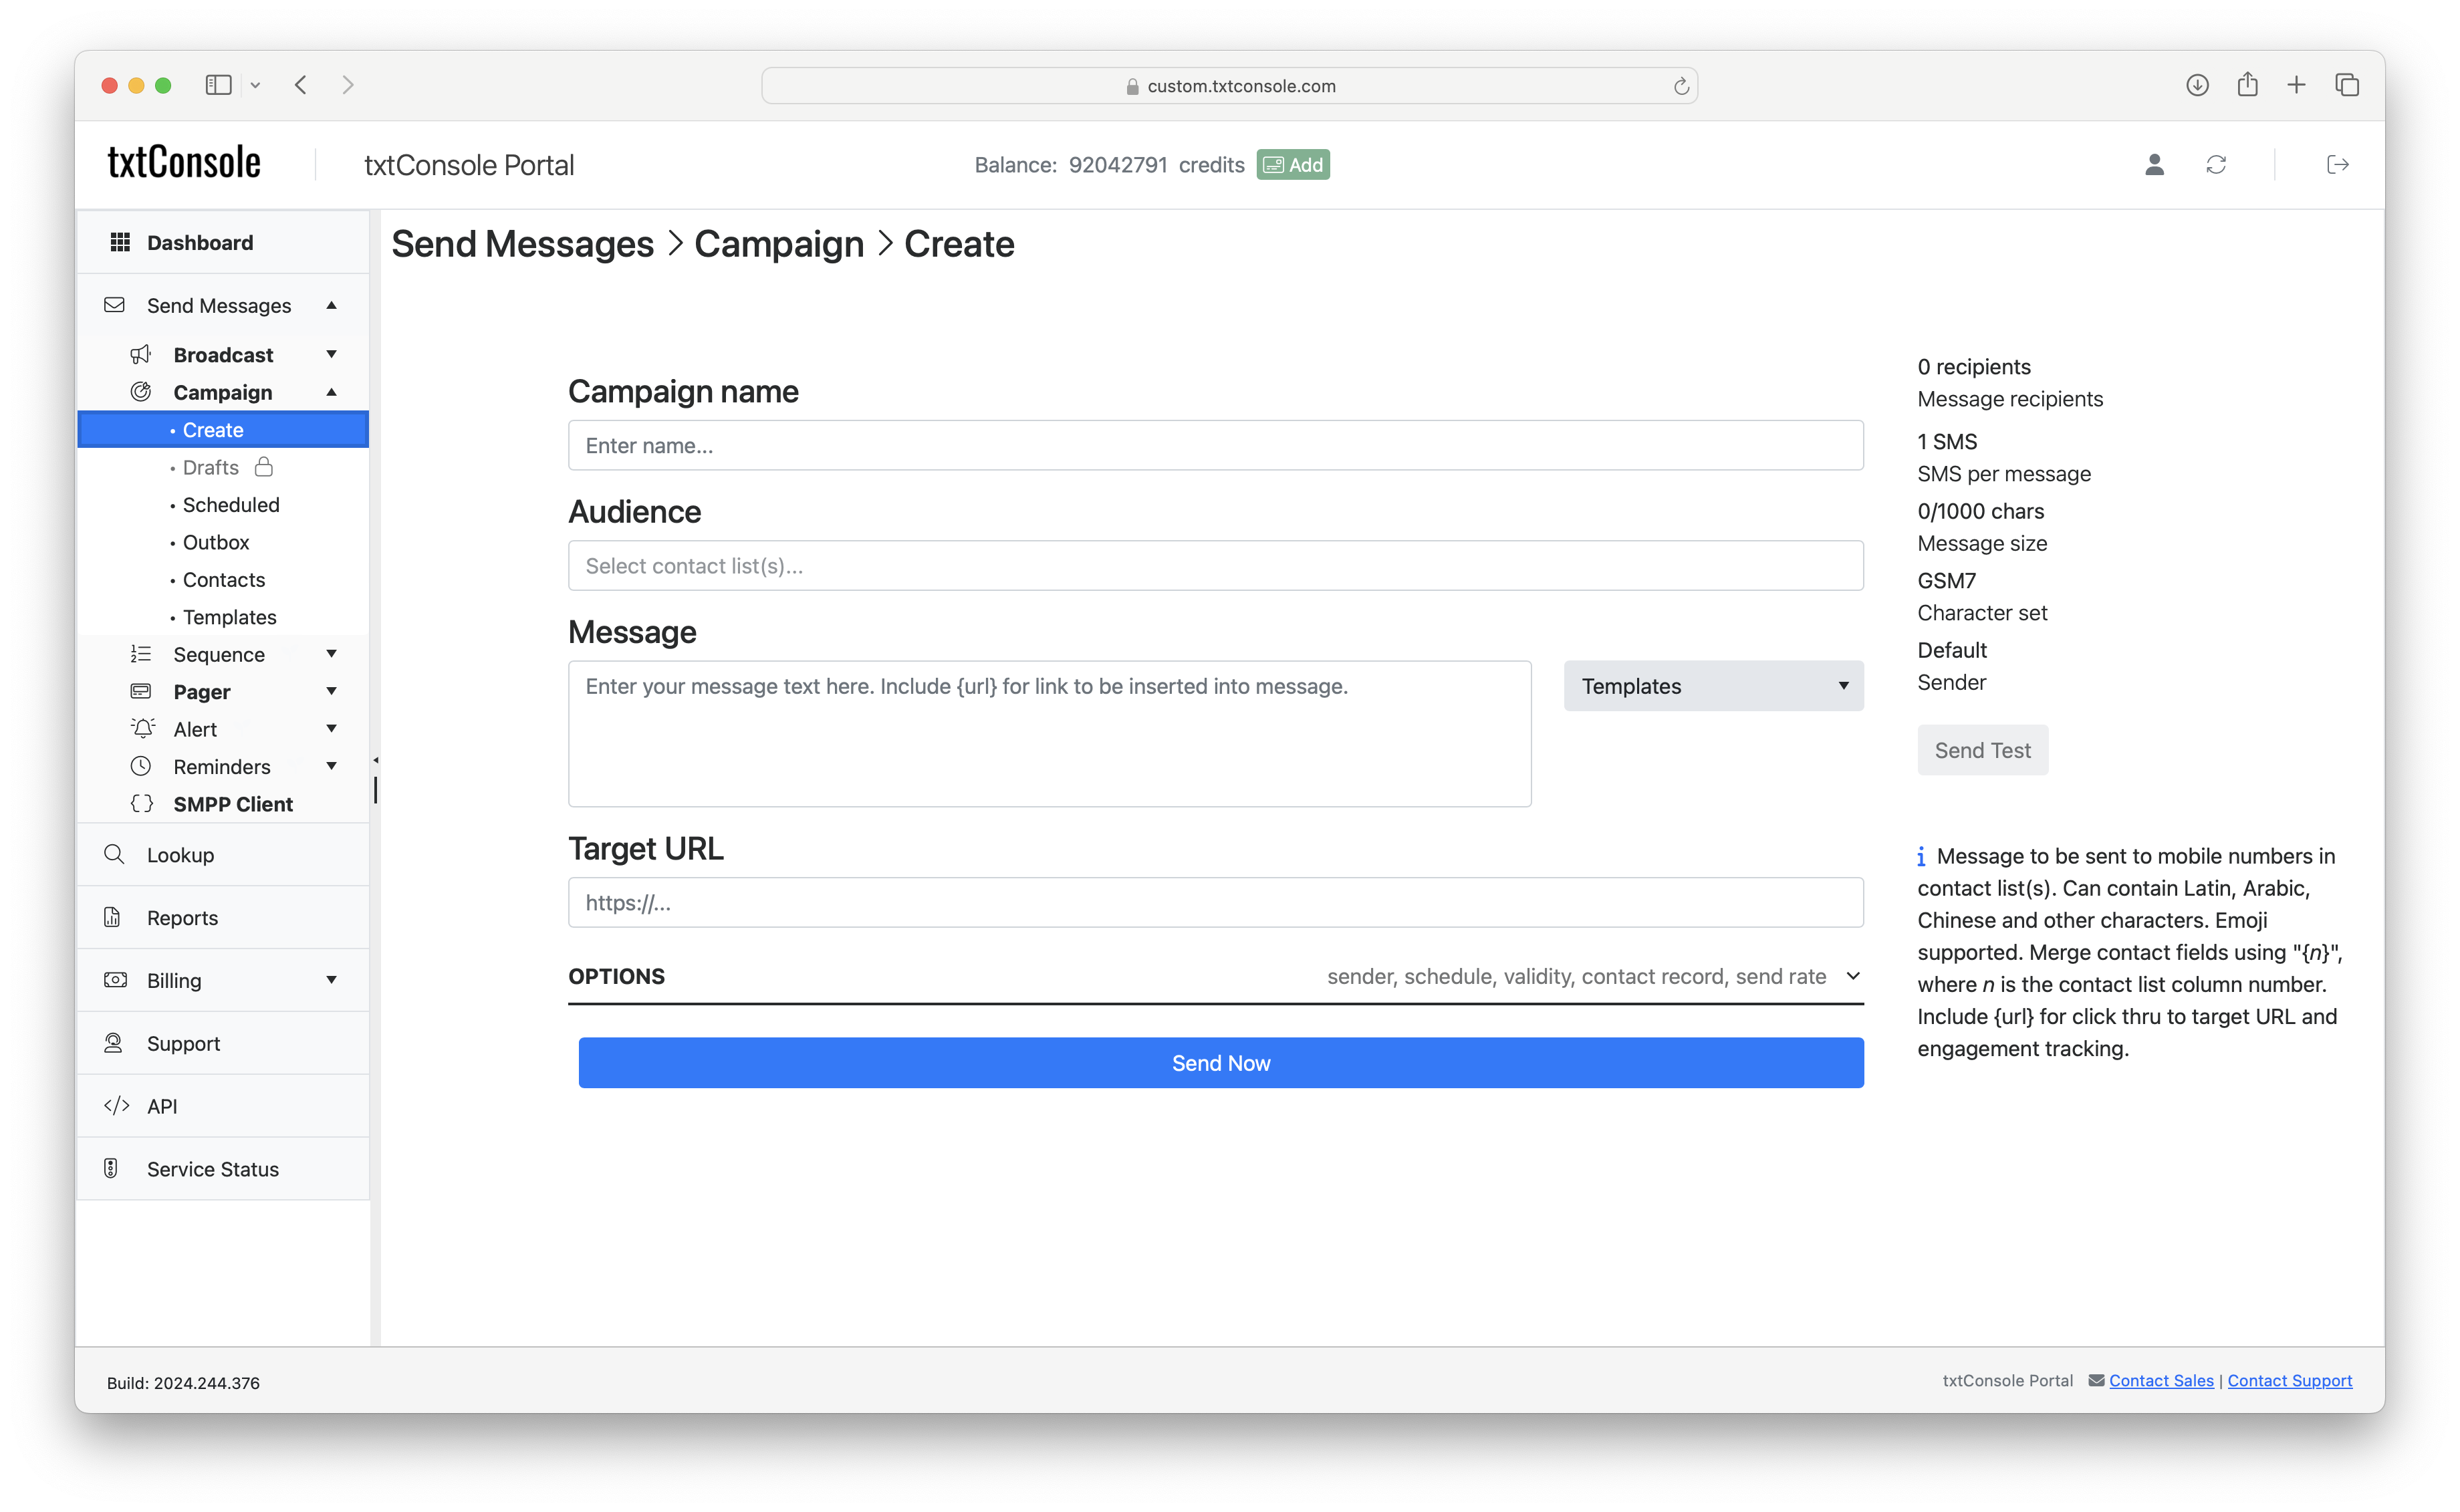
Create
The Campaign name is used to identify the campaign once created.
The Audience field is used to select one or more contacts lists to where the message is to be sent.
The message text is specified in the Message field. It can be a long or short message, and can contain "Latin", "GSM" or "UCS2" characters. The text "{url}" must be included for the tracking link that will redirect to the target URL.
The URL of the website you want to direct mobile users to should be included in the Target URL field.
The "Send Test" button can be used to send the message to an individual mobile number to check how it will appear when sent to those in the Audience field.
Options
Under the "Options" section, the sender address of the message can be entered. This address will default to that configured as the "Default source address" for the customer's SMPP account in the SSG Admin Portal .
If you wish to schedule the message to be sent later, then the date/time can be specified using "Scheduled delivery".
The information for a contact, as included with their mobile number in the contacts list, can optionally be passed to the target URL.
The "send rate (SMS/sec)" can be used to specify how quickly the message is sent.
Scheduled
Lists all campaigns that are scheduled but not yet running.
Outbox
View the status of sending your message, delivery performance and engagement with those messages.
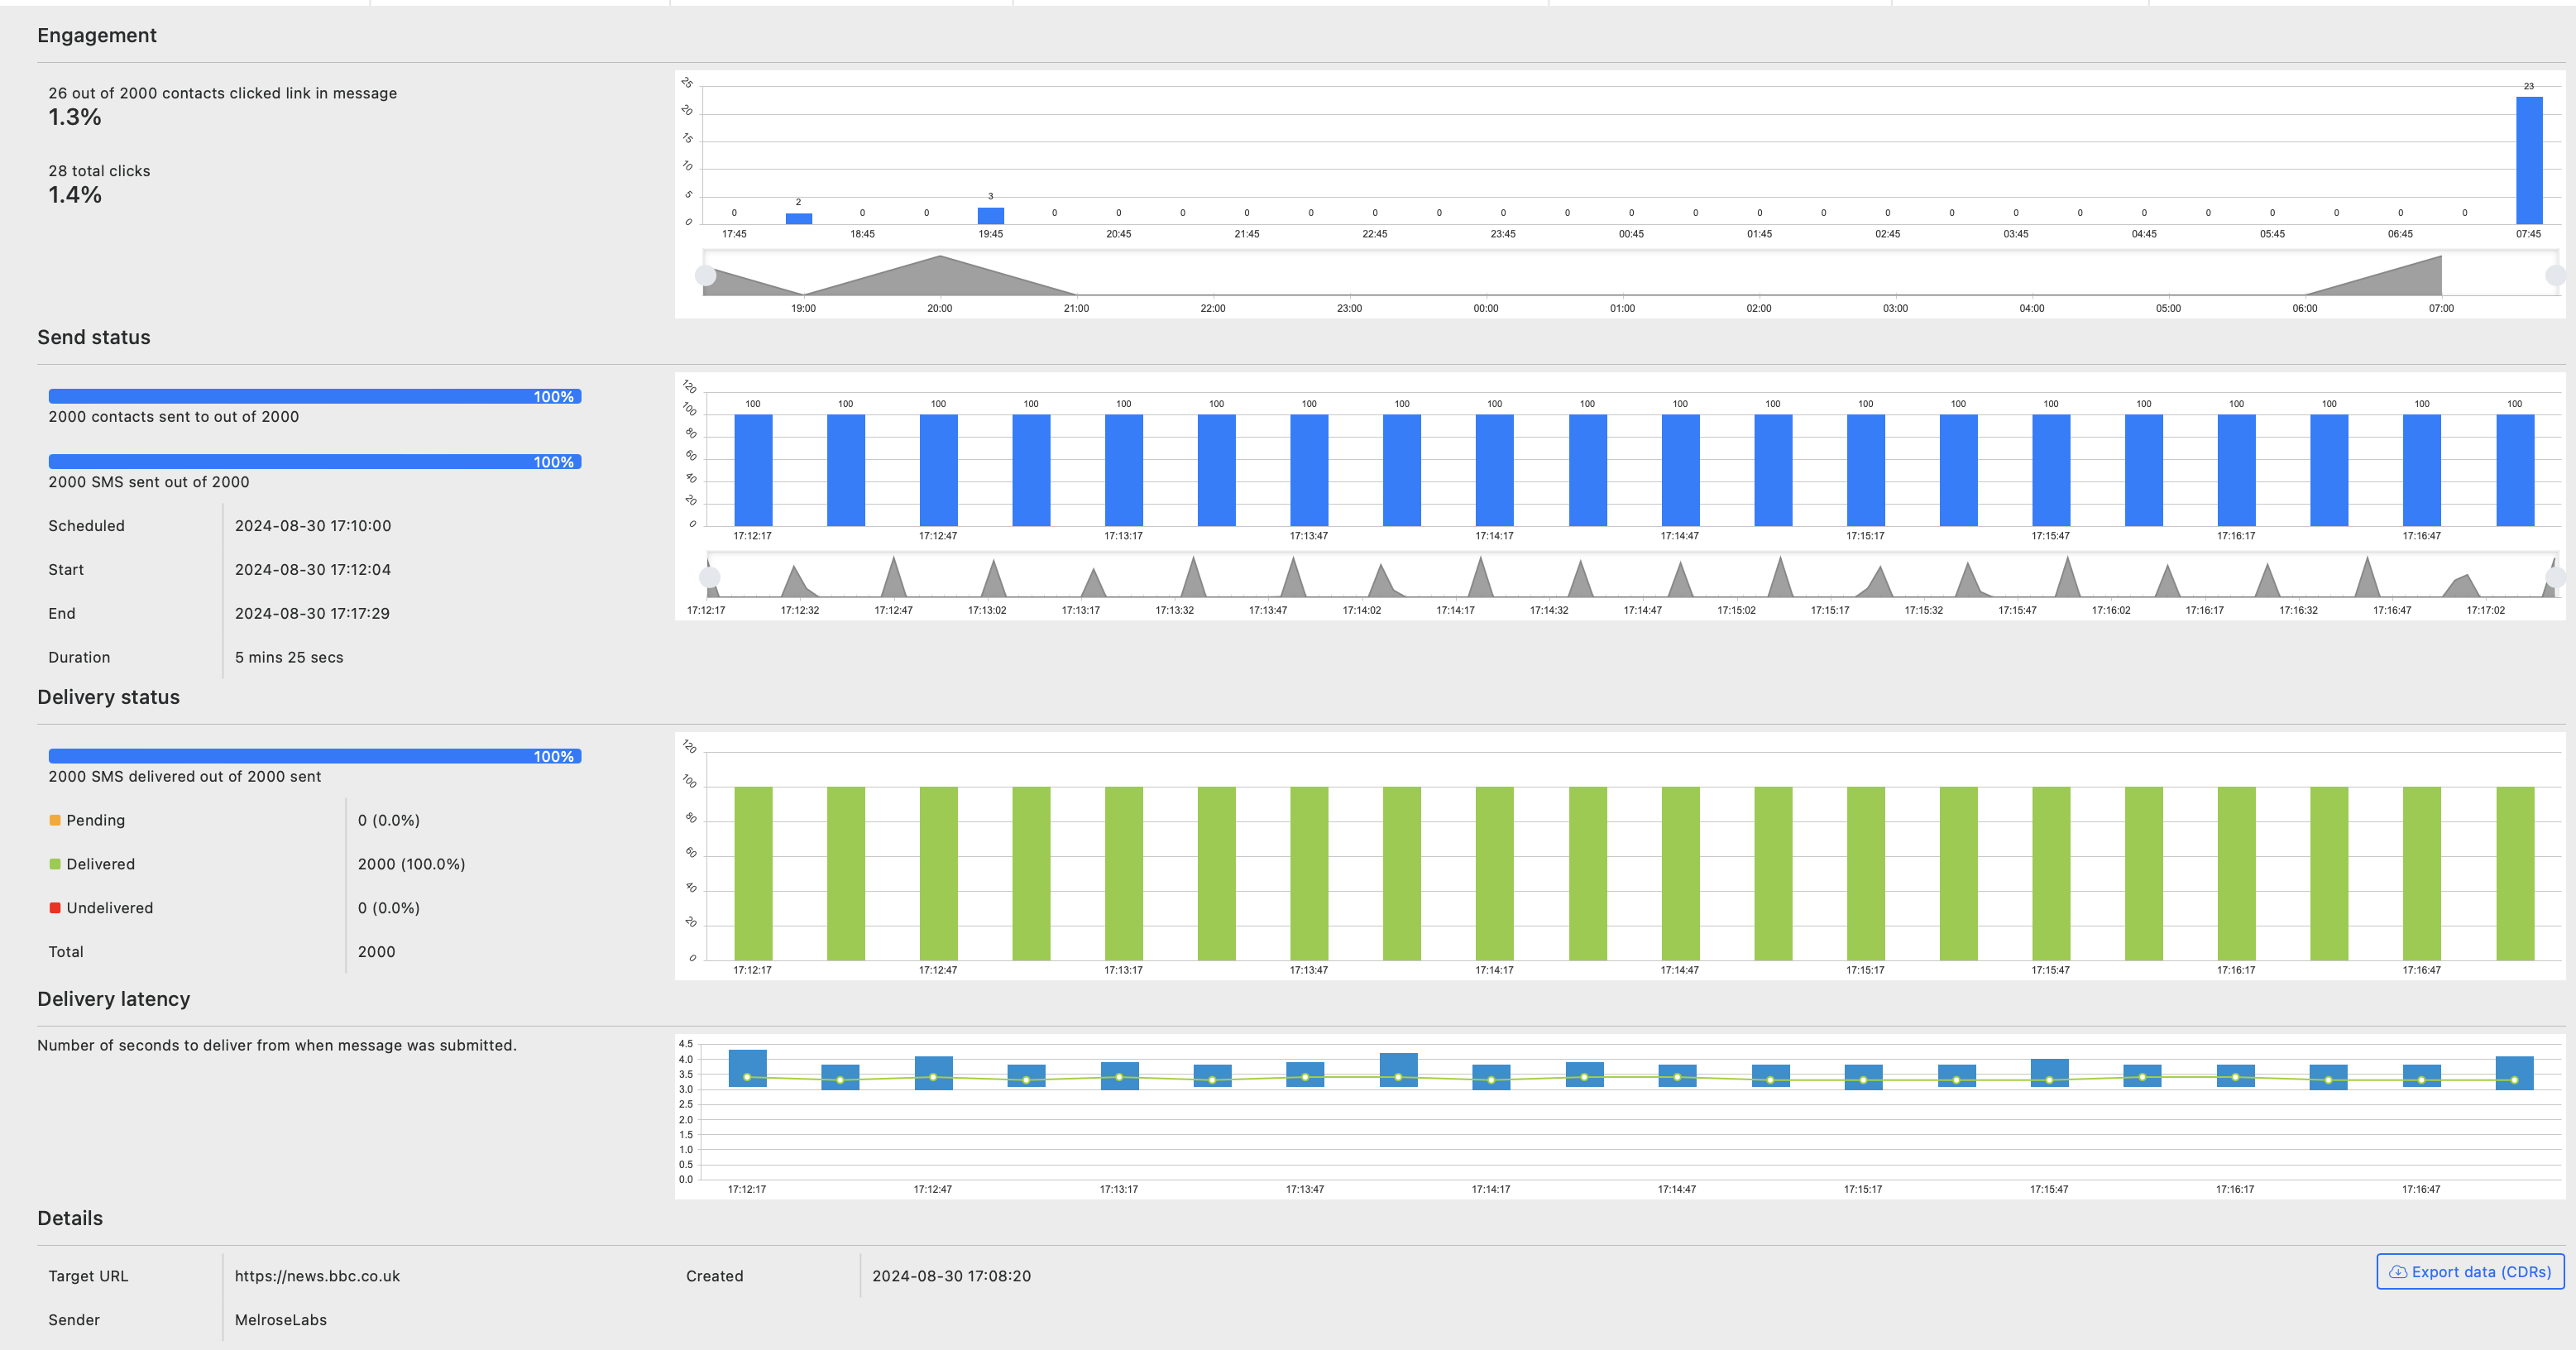
Export report
Select the individual campaign from the Outbox to show send status, delivery status and delivery latency, then click "Export data (CDRs)".
Click "Export data (engagement)" to download engagement report.
Templates
Message templates can be defined for quick compositing of pre-defined messages. For example:
"Unlock exclusive savings! 🛍️ Get 20% off your next purchase. Tap here: {url} to claim your discount. Hurry, offer ends soon!"
Updated about 1 year ago