

Billing
Customer billing
The Billing section allows you to view billing reports, manage invoices, create invoices, generate statements, manage customer account balances, and set up recurring charges.
A step-by-step walkthrough is in the Billing tutorial. Account balances has its own page.
Invoice accuracyMessage volumes billed to your customers by the platform conform to the following standard:
- <=0.001% inaccuracy (1 message per 100k)
- no over-billing of customer
Before you bill
Contact Support ([email protected]) to have billing enabled for your instance. Then complete Configuration > Company as described in Customisation:
- Sales, support and invoice sender names, addresses and signatures (invoice-from email must be verified)
- Invoicing details — postal address, invoice-from email, bank / wire details, footer note, and the first invoice number (numeric, starting with 1, for example
10000). These invoicing fields are changed by Support. - Email templates — including invoice payment reminders
- DNS SPF must include
amazonses.comif the platform sends invoice emails
On each customer, complete the Billing tab before you raise invoices. See Customers:
- VAT reg no — shown on the invoice
- Account code — short unique code used on invoices and for matching to your accounting system
- Payment terms (days) — used to calculate the due date (invoice date plus this number of days)
- Send invoices to (email) — one or more addresses, comma-separated
- Send invoices to (physical) — postal address shown on the invoice
Create invoices
Usage charges (MT SMS and similar) are collated into charge lines. You can also add manual charges. Invoices are created from charge lines that are not yet assigned to an invoice.
Go to Billing > Create invoices. Unassigned charge lines appear in this table. You can edit or delete them here.
Add a manual charge
- Click Create charge entry.
- Select the customer.
- Enter description, quantity, unit charge, currency, tax percentage, period and optional PO reference.
- Click Save.
Generate invoices
- Click Generate invoices.
- Confirm. Charge lines are grouped by customer, currency and PO reference into invoice documents.
- A dialog reports how many invoices were created, or that none were generated.
New invoices appear on the Pending tab in Billing > Invoices.
If no invoices are generated, typical causes are: there are no unassigned charge lines, or billing is not yet enabled for the instance.
Invoices
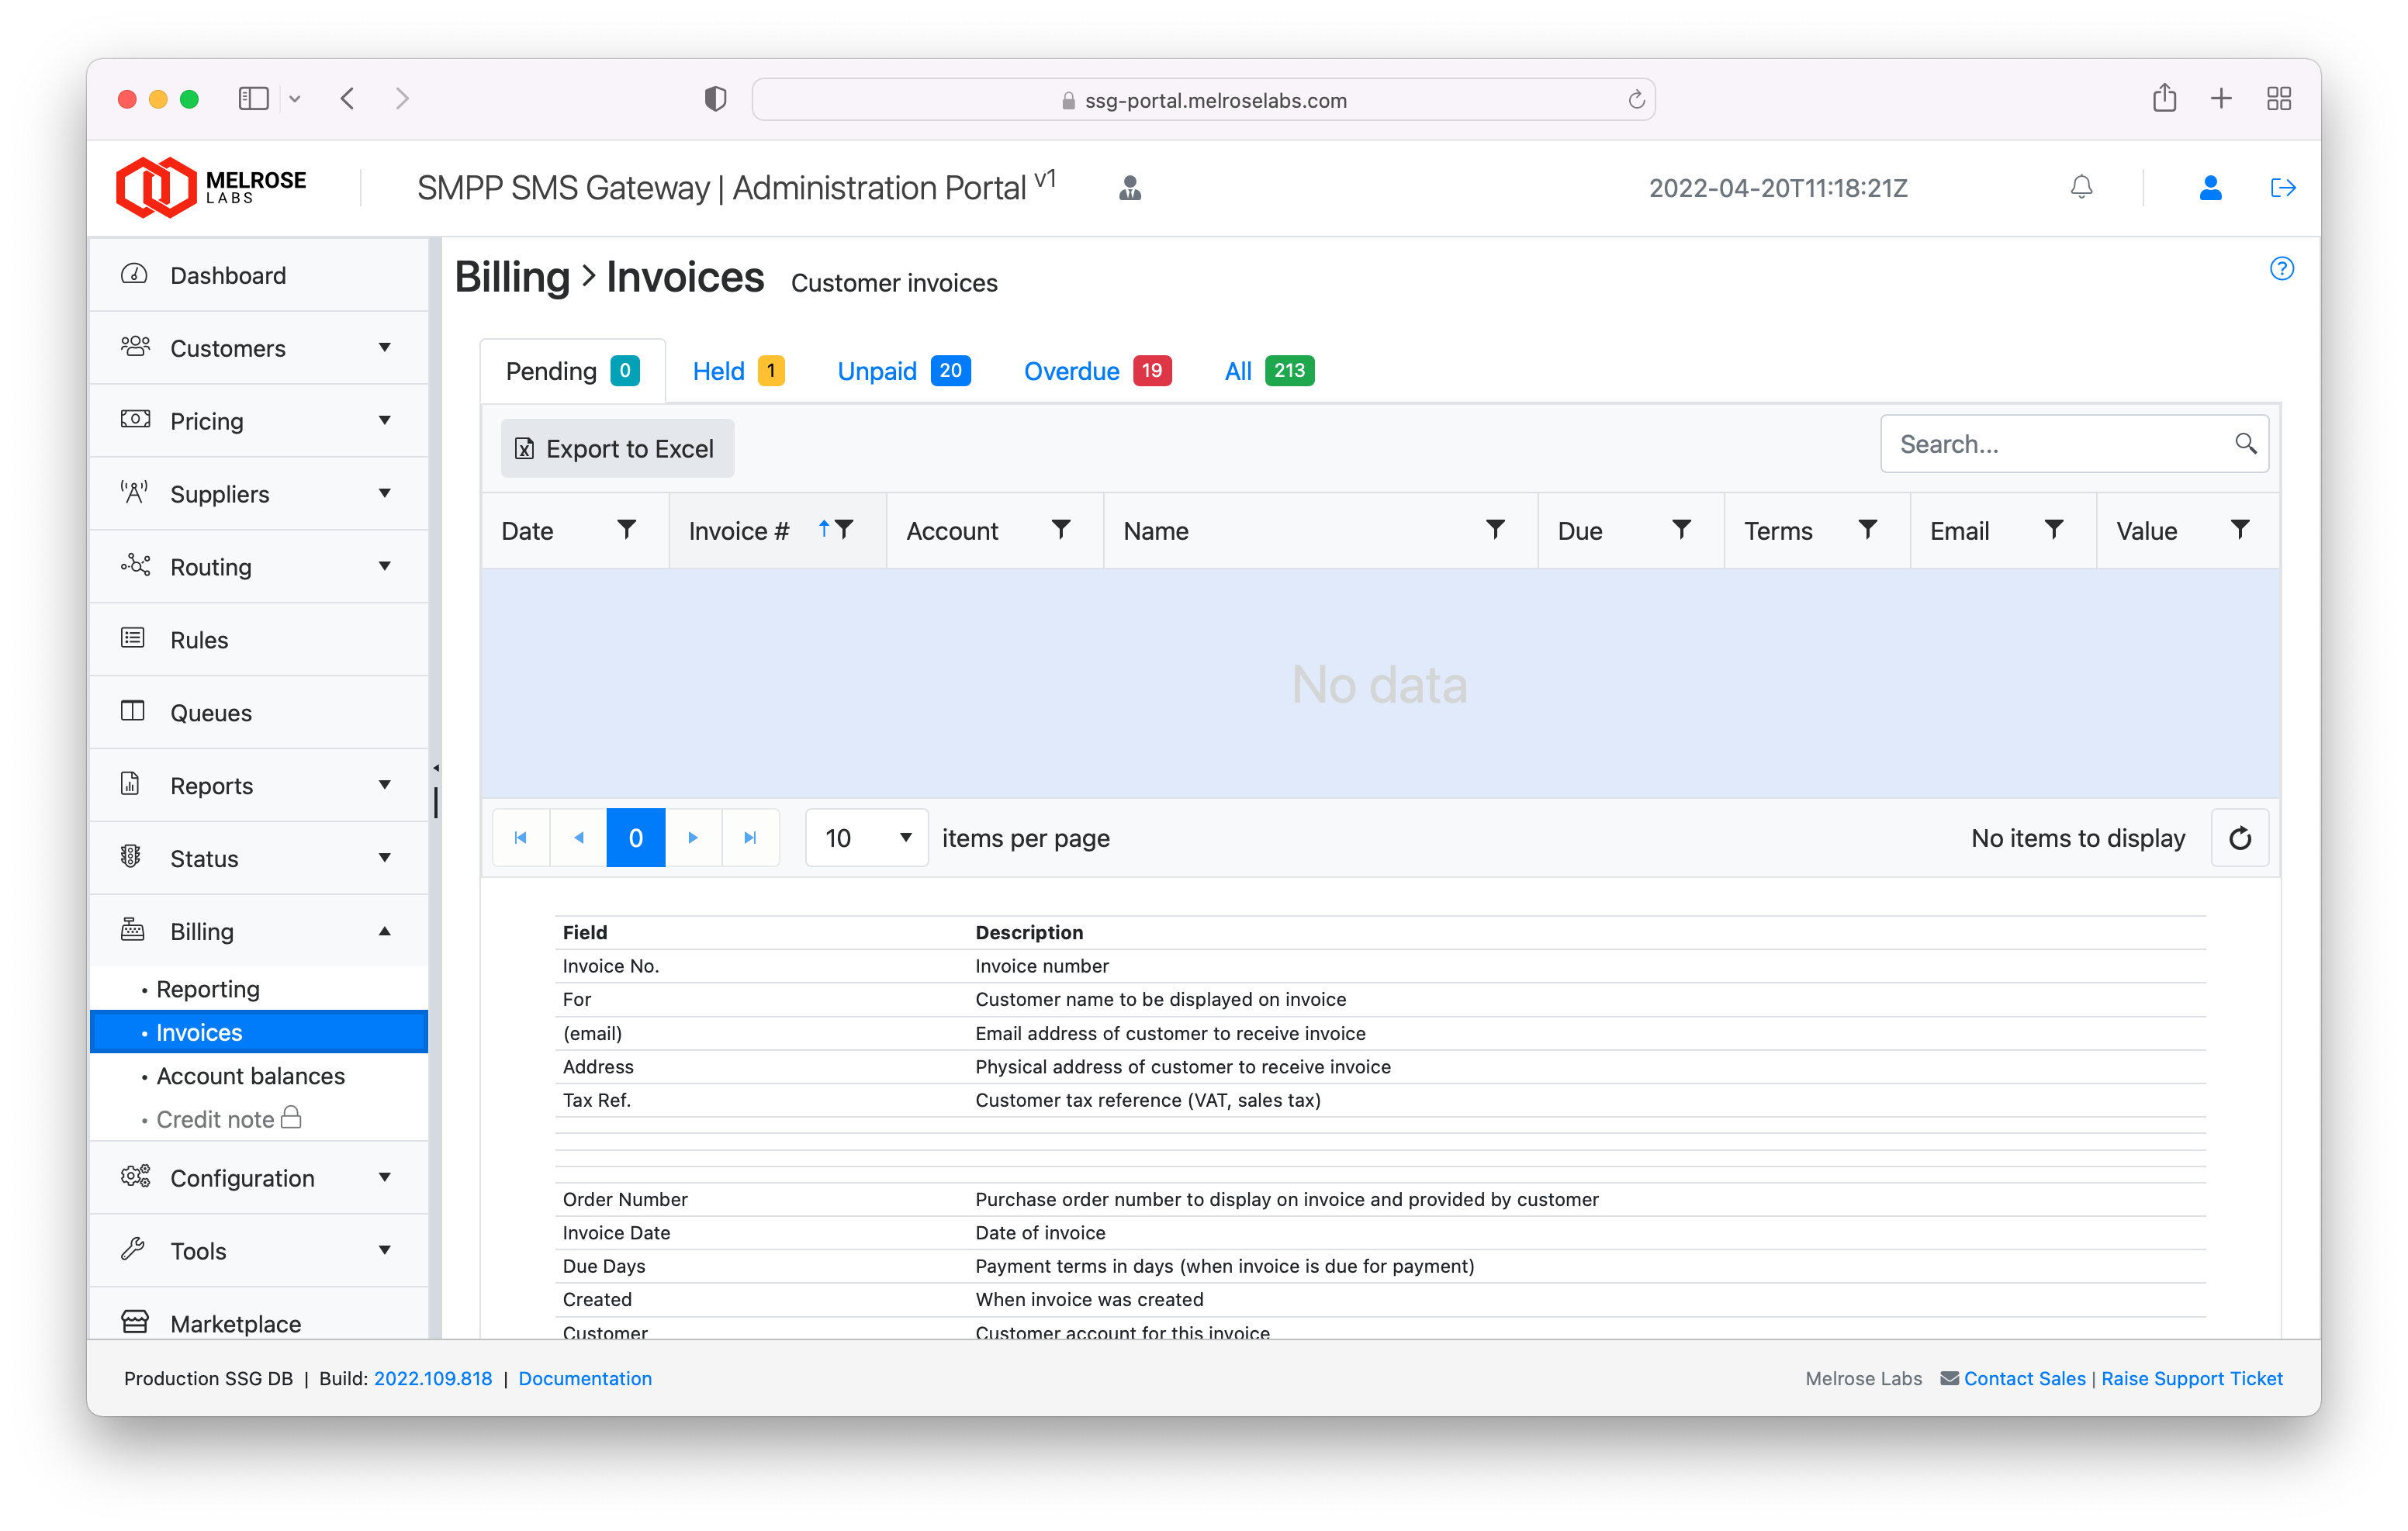
Go to Billing > Invoices. Tabs:
| Tab | Meaning | Typical actions |
|---|---|---|
| Pending | Newly created, not yet emailed | PDF, View, Email to the customer, Sent (mark as sent without emailing from the portal), Hold |
| Held | Parked for review and amendment | Edit, Unhold, View, Zero (set the grand total to zero), PDF |
| Unpaid | Emailed (or marked sent) and not paid | Paid, View, PDF. A total unpaid amount is shown in the instance base currency. |
| Overdue | Past the due date and unpaid | Email reminder, Write off, PDF. A total overdue amount is shown in the instance base currency. |
| All | Every invoice | View, PDF, Email to self. A monthly ZIP download is available from this tab. |
Due dates are the invoice date plus the customer's Payment terms (days). Tables support search and Excel export.
Send an invoice
- Open Pending.
- Click PDF to check the document.
- Click Email to send the PDF to the customer's invoice addresses, or Sent if you issued it outside the portal.
- The invoice moves to Unpaid.
Hold and correct
- On Pending, click Hold.
- On Held, click Edit to adjust details, Zero if the invoice should not be charged, or Unhold to return it to the workflow.
Record payment
On Unpaid, click Paid when the customer has paid. The paid date is stored and the invoice leaves the unpaid and overdue lists.
Overdue reminders
On Overdue, click Email reminder to send the reminder template. Write off removes the amount from collections.
Icons on unpaid and overdue rows show whether reminders are held for that customer or the account is on a hold-live status.
Statements
Go to Billing > Statements.
- Select the customer.
- The page shows Statement total, Account balance, and the list of balance transactions.
- Click Email statement to customer or Email statement to self.
Account balances
Customers need credit to submit messages. The balance is on the customer account and is shared by all of that customer's SMPP accounts.
Go to Billing > Account balances to view balances, add or remove credit, change Prepay / Postpay or currency, and review the audit trail.
See Account balances. Configure low-balance warning emails on the customer Balance tab.
Re-rate
Billing > Re-rate rewrites stored customer revenue on already-rated outbound (MT) traffic for one SMPP account and submit-time range.
Use it when a pricing-plan price was missing or wrong and the traffic should show the correct rate on:
- CDR downloads (
revenue_val/revenue_cur) - Reports, Financial and Analysis views that read those CDRs or hourly aggregates
Correct the live pricing plan as well. Re-rate does not change future submits.
What re-rate does not changeThe live pricing plan, invoices, invoice charge lines and account balances are not changed. Only stored revenue on this instance is updated. View-only users can preview but cannot apply.
Adding a missing price in Pricing > Plan prices affects new traffic only. Historical completed messages still have the old (or empty) revenue until you re-rate them. See Analysis > Missing prices.
Scope
| Field | Required | Notes |
|---|---|---|
| Customer | Yes | Customer that owns the SMPP account |
| SMPP account | Yes | Only that account's MT traffic is updated |
| Start / End | Yes | Browser local time, aligned to the hour. The UTC equivalent is shown under each field. End is exclusive and must be before the current UTC hour so live traffic is not rewritten. Maximum range is 366 days. Defaults to the previous 24 hours ending at the last completed hour. |
| Country | No | Limit to one destination country. Leave blank only if every destination in the range should receive the same price. |
| Network | No | Limit to one network. A country must be selected first. |
| Charge basis | Yes | Submit (all accepted MT) — every matching message is priced. Delivered only — delivered messages (status 2) receive the new price; other matching messages are set to zero revenue. |
| Price | Yes | New unit price. Cannot be negative. Up to six decimal places. |
| Currency | Yes | New revenue currency. Cannot be None. |
| Notify email | Yes | Defaults to your login address. Use Use my login email to reset it. |
Inbound (MO) messages are never included.
Preview (dry run)
- Complete the scope fields.
- Click Preview (dry run).
- Review the tiles and tables before you apply.
The preview shows:
| Tile / table | Description |
|---|---|
| CDR rows | Matching outbound message records |
| Hourly buckets | Matching hourly aggregate rows |
| CDR revenue delta | Proposed revenue minus current stored revenue (in the new currency's units) |
| CDR breakdown by destination | Messages, delivered, current revenue, new revenue and delta per country / network |
| Hourly reporting breakdown | The same figures from hourly aggregates |
| Sample CDRs (first 50) | Message ID, submit time, MSISDN, destination, status, and current versus proposed revenue |
A warning is shown if you did not set a country and the range covers more than one destination.
Preview also:
- emails a summary (with a CSV of the destination breakdown) to Notify email
- adds a note on the customer Notes tab
- enables Apply re-rate
The preview is bound to the exact scope you submitted. It expires after 30 minutes. If you change any field, or if more traffic arrives that would change the row counts, run preview again.
There must be matching MT traffic in the range. A single preview cannot cover more than 2,000,000 message records — narrow the range or destination filter if you hit that limit.
Apply
- Confirm the preview is the traffic and price you intend.
- Click Apply re-rate.
- Type
RE-RATEand confirm.
Matching CDR revenue_val / revenue_cur fields and hourly rev_sum / revenue_cur fields are updated in one transaction. If the affected row counts no longer match the preview, no changes are written and you must preview again.
After a successful apply:
- another note is added on the customer account
- a second summary email is sent (subject starts with Re-rate APPLIED)
- Apply re-rate is disabled until you run a new preview
Download CDRs or open Reports, Financial or Analysis for that account and range to confirm the new revenue.
Existing invoices are unchanged. If the traffic has already been invoiced and the billed amount must change, correct that invoice separately (hold and edit, or a manual credit / charge). See Invoices.
Recurring charges
Go to Billing > Recurring.
- Click New recurring charge.
- Select the customer.
- Enter the description, quantity, charge definition, next run time and optional expiry.
- Click Save.
When a recurring charge falls due, a charge line is created and can be picked up the next time you click Generate invoices. Recurring service definitions used across customers are configured under Configuration > Company > Billing.
Reporting
Billing > Reporting is for billed volumes and invoice revenue, not live traffic. For traffic, revenue and cost by customer or supplier, see Reports.
| Report | Description |
|---|---|
| Unbilled and billed volumes | Unbilled, billed and zero-revenue quantities over a date range (optional customer filter and hour/day/week/month granularity) |
| Invoiced revenue (monthly) | Invoice revenue by month |
| Invoiced revenue (annual) | Invoice revenue by year |
| Accuracy | Actual message volume versus billed volume for recent months, with the difference and percentage |
Use these after each billing run to confirm volumes match Reports and that nothing remains unbilled unexpectedly. Differences should stay within the billed-volume accuracy standard.
Updated about 2 months ago